Windows 10 settings superguide: Get personal with your PC

 Image: Microsoft
If there’s one section of Windows 10’s Settings app that could be considered “fun” it would have to be the Personalization section. This is where you get to make your PC yours by setting the background image, choosing a color scheme, and getting the lock screen to behave just the way you like it. Let’s take a look at Settings > Personalization as part of our Windows 10 settings superguide.
Background
IDG
IDG
IDG
Ever since Windows 95 we’ve been using our desktop’s wallpaper to express a little bit of ourselves in this digital world. These days it’s a lot easier since we don’t have to worry about creating bitmap images, and can instead turn to commonly used .jpeg and .png formats.
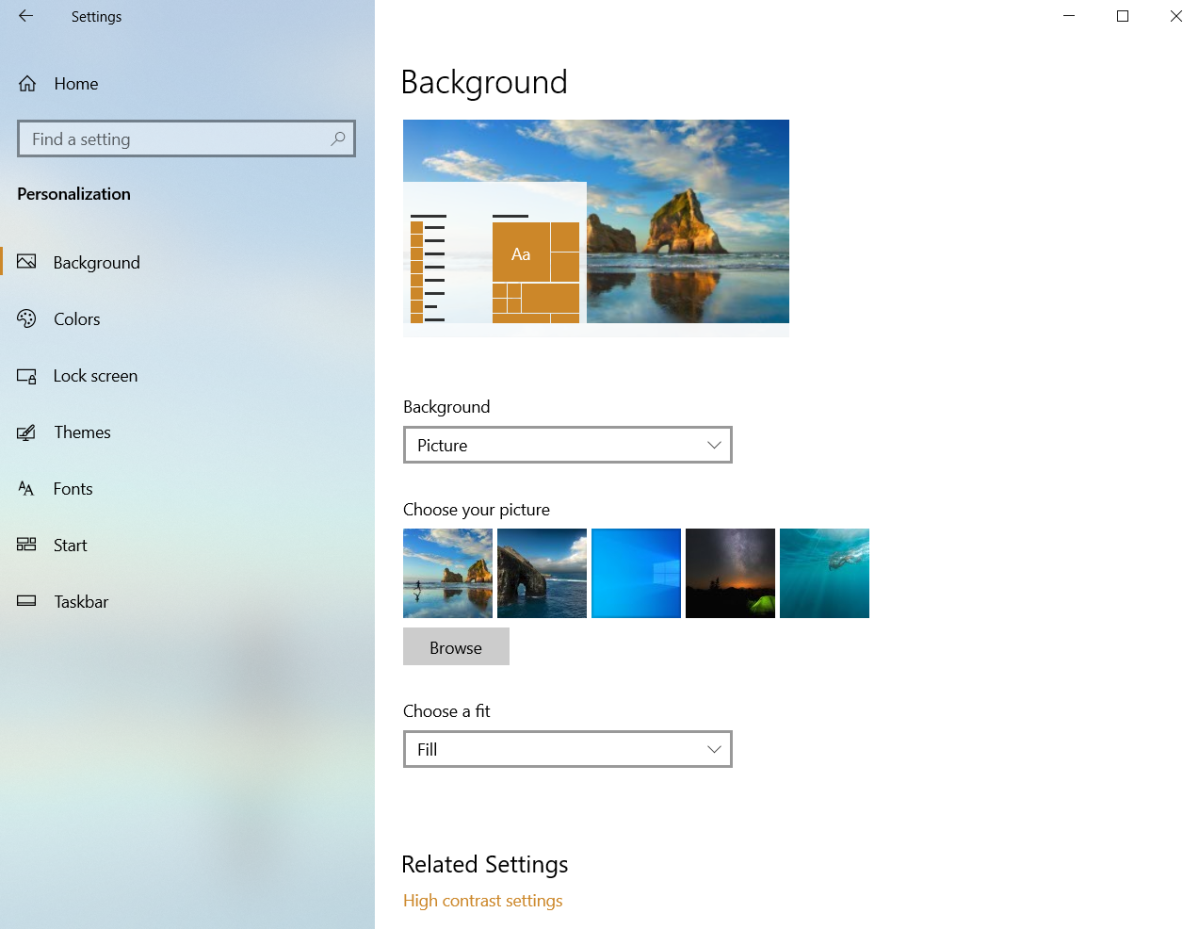
Not a whole lot has changed for backgrounds since the ’90s other than the quality of the images going up. You get to pick between three options for your background: Picture, Solid color, and Slideshow. If you choose Picture you can either select some of the built-in images, or click the Browse button to choose an image from your files.
Slideshow has a similar approach. By default, the slideshow just uses whatever pictures are inside your Pictures library, or you can choose a specific folder on your PC—Settings calls it an album. The Slideshow setting offers the option to change the picture at varying intervals from one minute to once a day. You can also choose a shuffle mode if you don’t want the images displayed in order, and there’s an option to decide whether or not you want the slideshow to run on battery power. Finally, you can choose how the images will be displayed such as fill, fit, stretch, tile, center, and so on.
If you choose to set a solid color as your background, you can pick from Windows’ standard options, or you can create a custom color using the built-in color picker.
Colors
IDG
IDG
IDG
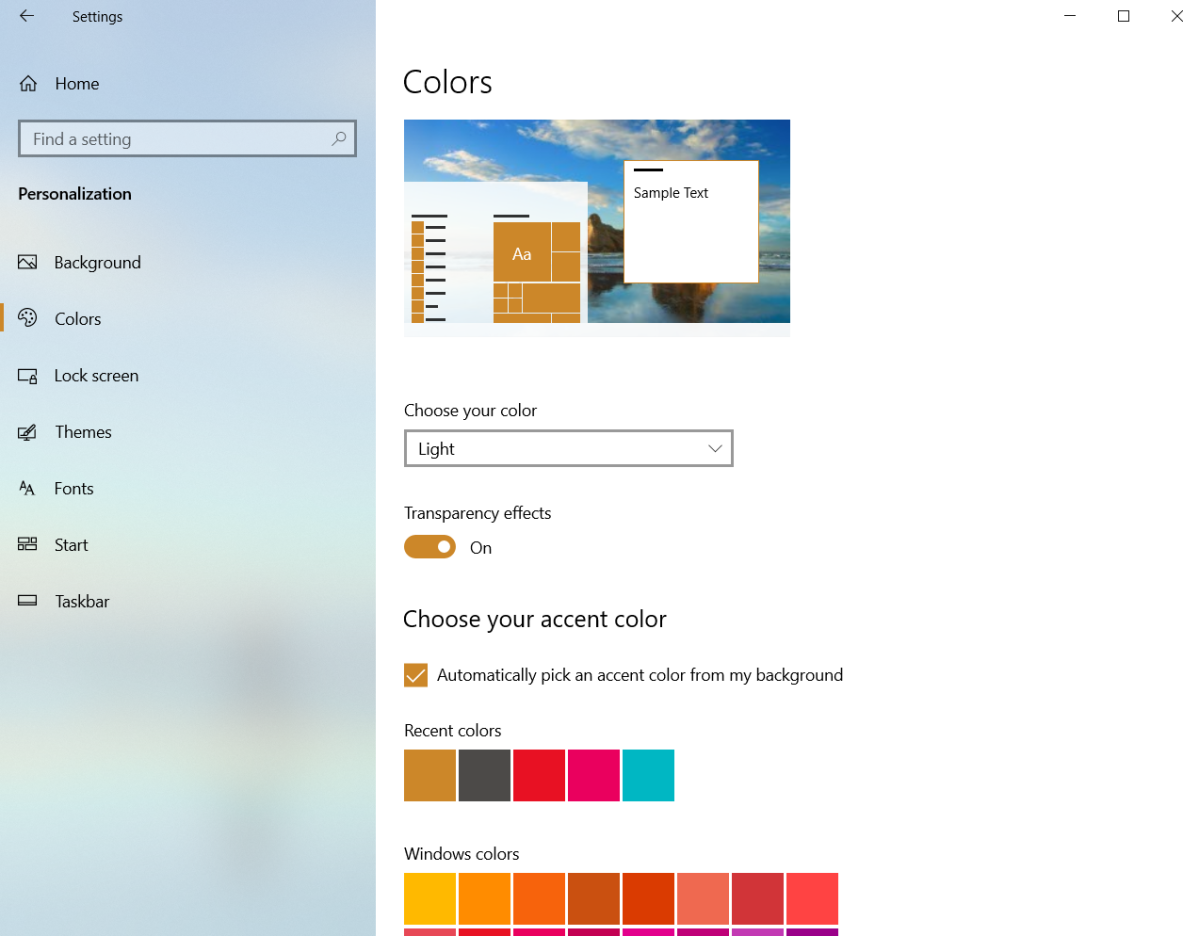
Once you’ve got the background set, you can set the colors to match. At the top is a drop-down menu item called Choose your color with three options including Light, Dark, and Custom. The first two are very similar. Once you choose between a predominantly light or dark option, use an on/off slider to choose whether you want to employ transparency effects. This allows some portions of the interface, such as the Start menu, to be slightly transparent with the application windows behind it blurred.
Underneath that, you can choose an accent color, or create your own by clicking Custom Color below the built-in options. These accent colors are for Windows title bars and other portions of the interface. If you don’t want to choose your own color, you can allow Windows 10 to do it based on your color scheme, and the operating system usually does a pretty good job of this.
Then below that you have to check boxes for where you want the accent colors to show up: Start, taskbar, and action center and Title bars and window borders. That first check box won’t be allowed to change unless you’ve set your option to Dark mode.
If you go with a Custom setup then your options change. First, you get two new radio buttons. The first allows you to choose Light or Dark for the default Windows mode (the overall color scheme), and then you can choose Light or Dark for the default app mode. Everything else after that is the same as choosing a light or dark color scheme.
Lock Screen
IDG
IDG
IDG
Just like your phone, there are a lot of different options you can put on your lock screen beyond just images. You can choose to see app notifications there as well.
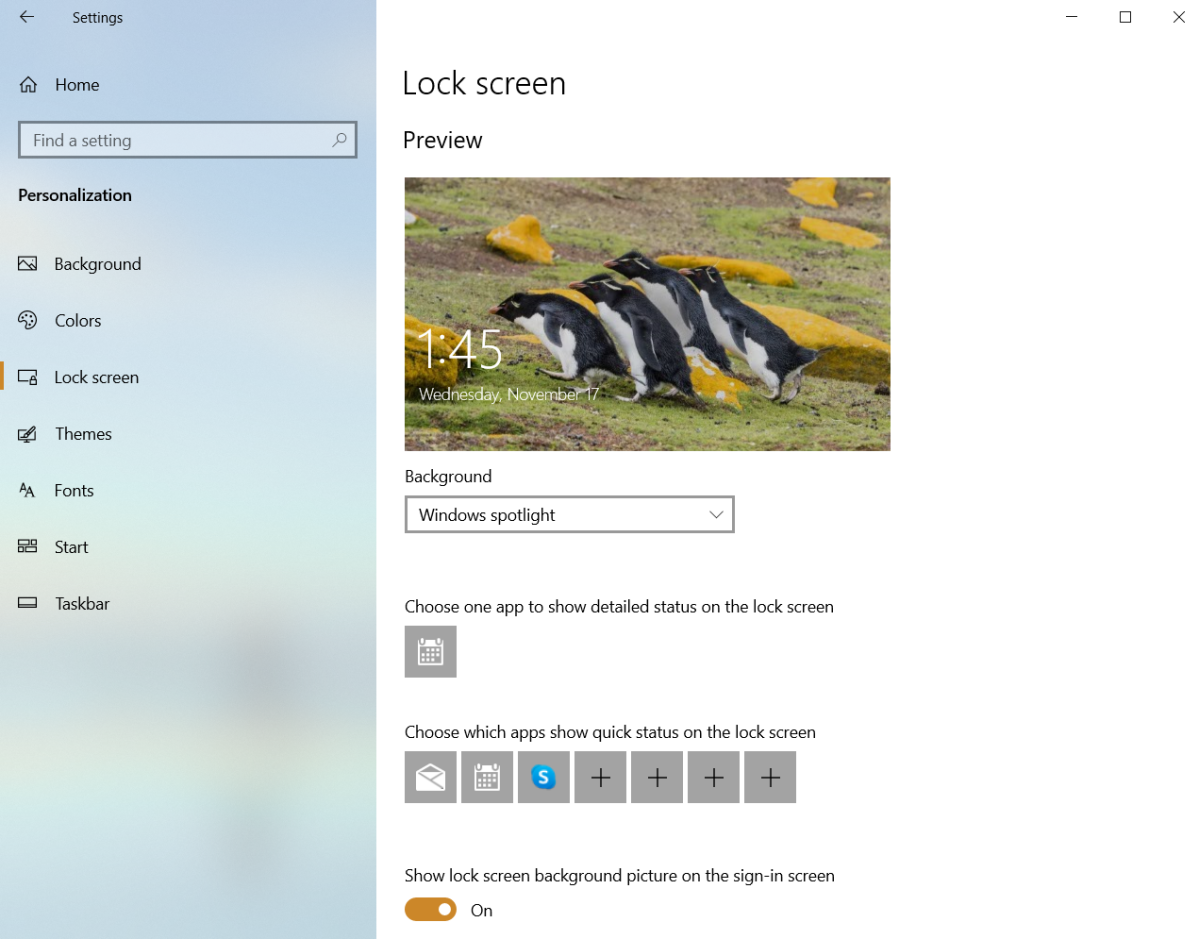
At the top of this screen is the option to choose an image. Just like the backgrounds, you can choose between built-in Windows options, an image of your choosing, or a slideshow. By default, Windows 10 uses Spotlight, which comes from Bing images and features a stunning new landscape picture every day or two.
Below the image selection we have the various apps you can add to your lock screen such as Mail, Calendar, and Skype.
Finally there’s an option to show your lock screen background image on the sign-in screen—this option is turned on by default.
Themes
IDG
IDG
IDG
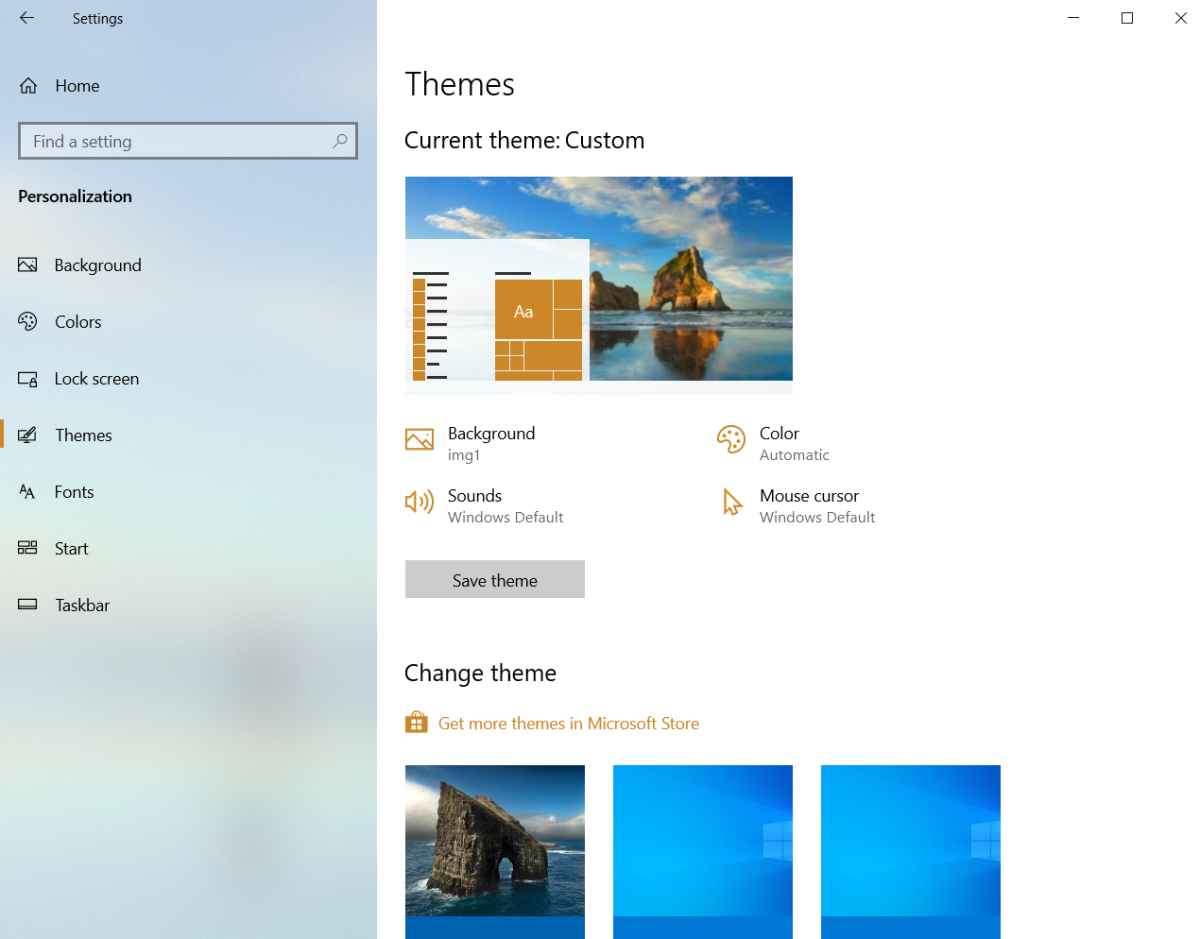
Windows 10 themes are similar to what we’ve seen in other versions of the operating system. Themes are a visual profile that determines the desktop background, system sounds, colors, and mouse cursor appearance. You can save these customized setups and then switch between them. Microsoft also offers built-in themes, as well as the ability to sync themes across your various Windows devices. If you don’t want to sync themes you can turn that off at Settings > Accounts > Sync your settings.
Fonts
If you want to know which fonts are installed on your system, this is the place to find out. If there’s a particular font you want to add you can do that here by grabbing items from the Microsoft Store. It’s also possible to drag-and-drop font files that you’ve downloaded from the internet in this section. You can’t actually do anything with the fonts you have here; this is simply a way to look at your system’s library of fonts.
Start
IDG
IDG
IDG
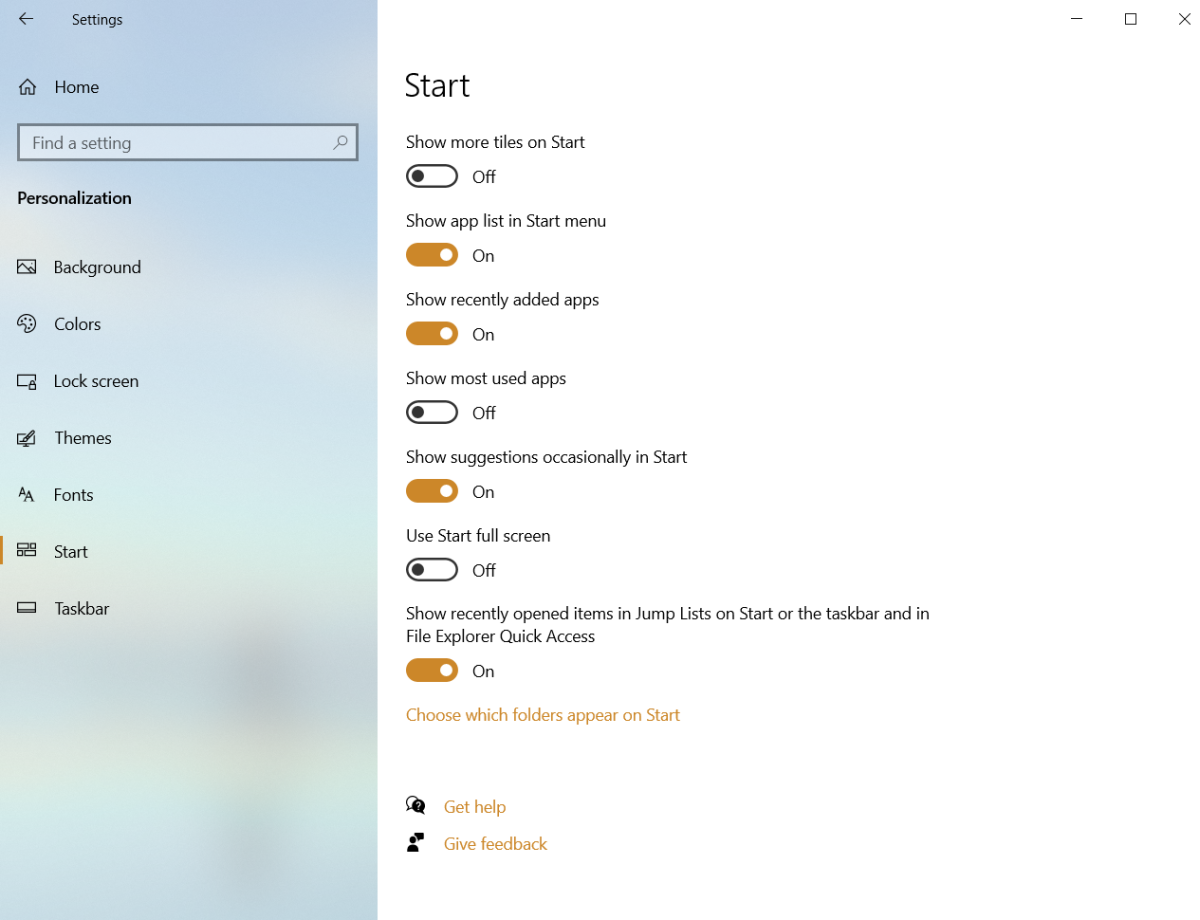
There aren’t a ton of customization options for the Start menu, but there are a few on/off sliders in this section that can help improve your experience.
If tiles are your thing (don’t get too attached, they’ve been dumped in Windows 11), you can set the Start menu to show more tiles. You can also turn off the list of apps on your PC or turn off the option that puts newly installed apps and programs at the top of the app list.
One useful option that isn’t on by default is Show most used apps, which can be very helpful if you don’t like to pin your most commonly used apps to the taskbar.
If you don’t want to see suggestions in the Start menu, there’s an option to turn that off. Finally, there’s an option to make your Start menu full screen if you’re missing Windows 8, as well as an option to turn off Jump Lists on the taskbar. Why you would want to turn off one of the most useful features Microsoft ever added to Windows is beyond me, but if you really can’t stand Jump Lists you can get rid of them.
Taskbar
IDG
IDG
IDG
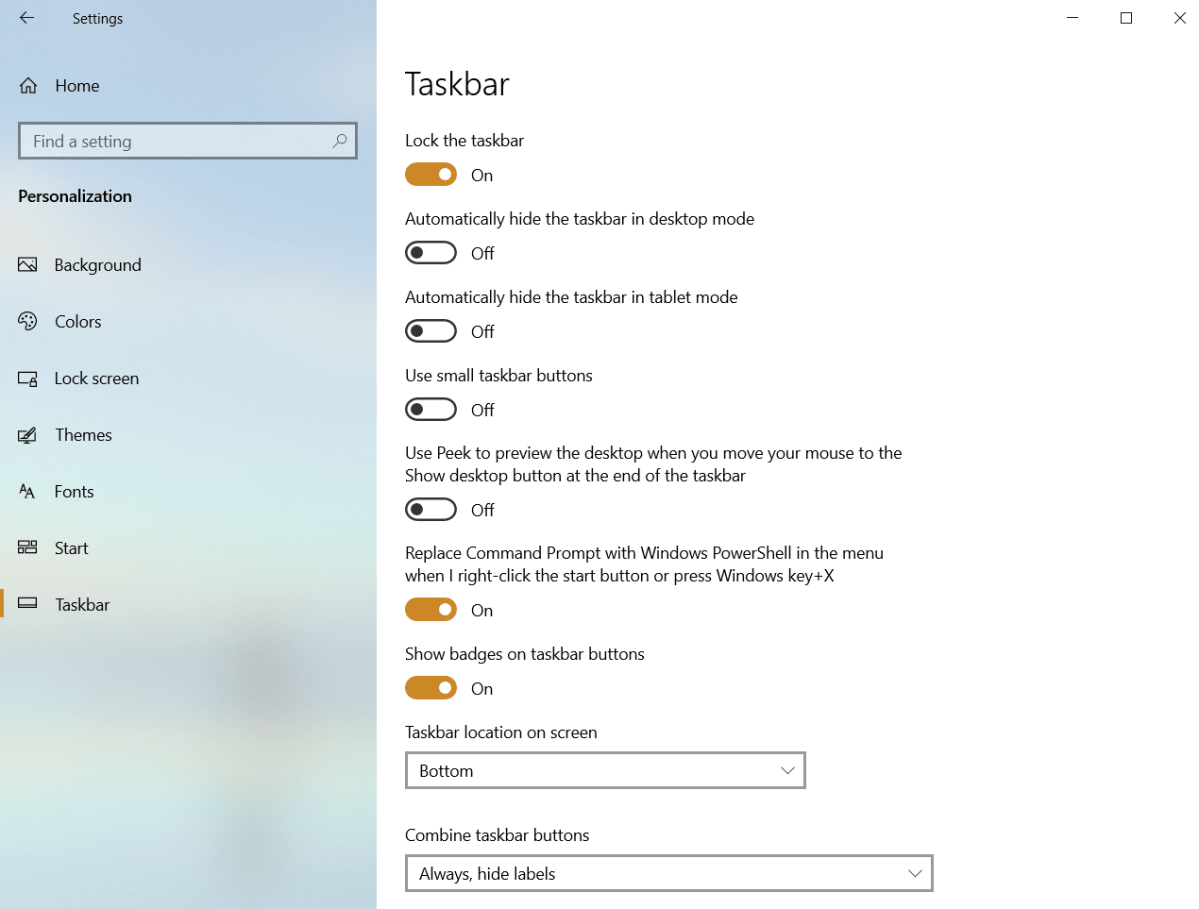
Lastly, we get to the taskbar customization section. Just like the Start options, we get a list of mostly on/off sliders. The most important of which is the Lock the taskbar option that makes sure you, or some toddler with a predilection for mouse clicking, doesn’t accidentally throw your taskbar onto the left side of your display.
An interesting option is the ability to automatically hide the taskbar when in desktop mode, or automatically hide it in tablet mode. You can also set small taskbar buttons to shrink the size of the taskbar, as well as create more room on it.
Then there’s an option that’s not on by default to enable Peek. When activated, if you hover your mouse over the Show desktop button on the far right of the taskbar, Peek will automatically show your desktop. This alleviates the need to click on the button, but it can get annoying if you frequently move the mouse over that button without meaning to.
If you prefer the regular command prompt to PowerShell then turn off the slider labeled “Replace Command Prompt with Windows PowerShell in the menu when I right-click the start button or press Windows key+X.”
One final slider turns off notification badges on taskbar buttons (icons) such as an unread count for messages.
After the on/off sliders you get two drop-down menu items. The first moves the taskbar from the bottom to the left, right, or top. The final drop-down menu item lets you separate taskbar icons for every window if you don’t like the default option where windows from the same desktop program are combined into one icon on the taskbar. This drop-down also has a section to only combine icons when the taskbar gets full.
But that’s not all! If you have multiple displays, you can choose to show the taskbar on all your displays, as well as all taskbar buttons on both monitors, and the same option to combine or separate out taskbar icons when opening multiple windows in the same program.
Finally, we get the People section where you can show the People app on the taskbar, and set various options for that app if you’re one of the rare birds who uses it.
That’s our tour of the Settings > Personalization section. Happy customizing!
Author: Ian Paul, Contributor

Ian is an independent writer based in Israel who has never met a tech subject he didn’t like. He primarily covers Windows, PC and gaming hardware, video and music streaming services, social networks, and browsers. When he’s not covering the news he’s working on how-to tips for PC users, or tuning his eGPU setup.
Recent stories by Ian Paul:
The best free software for your PCLoad up that new PC with Windows 10 Home for just $50Windows 10 System Settings superguide: How to adjust sound, notifications, and more


