Raspberry Pi troubleshooting: Helpful fixes to common problems

 Image: Kiklas / Shutterstock.com
Single-board computers have exploded in popularity in recent years among tinkerers and mini-PC enthusiasts alike. Spearheaded by the iconic $35 Raspberry Pi, these boards are energy-efficient, versatile, and wonderfully open to experimentation — but far from error-free.
Compactness doesn’t protect against errors. Of course, single-board computers can sometimes go on the fritz. One big advantage the Raspberry Pi holds over classic desktop PC or notebook is undoubtedly the absence of moving mechanical components, which makes troubleshooting easier. Better yet, two major problems can be solved very easily.
What makes troubleshooting somewhat more difficult with the Raspberry Pi is the variety of models. This article focuses on the more recent Raspberry Pi 3 and 4, but the fixes outlined also apply to rival Odroid, Arduino, or Beagleboard single-board computers.
Put it in a case!

Don’t leave your Raspberry Pi open to the elements.
Don’t leave your Raspberry Pi open to the elements.
Alaina Yee / Foundry
Don’t leave your Raspberry Pi open to the elements.
Alaina Yee / Foundry
Alaina Yee / Foundry
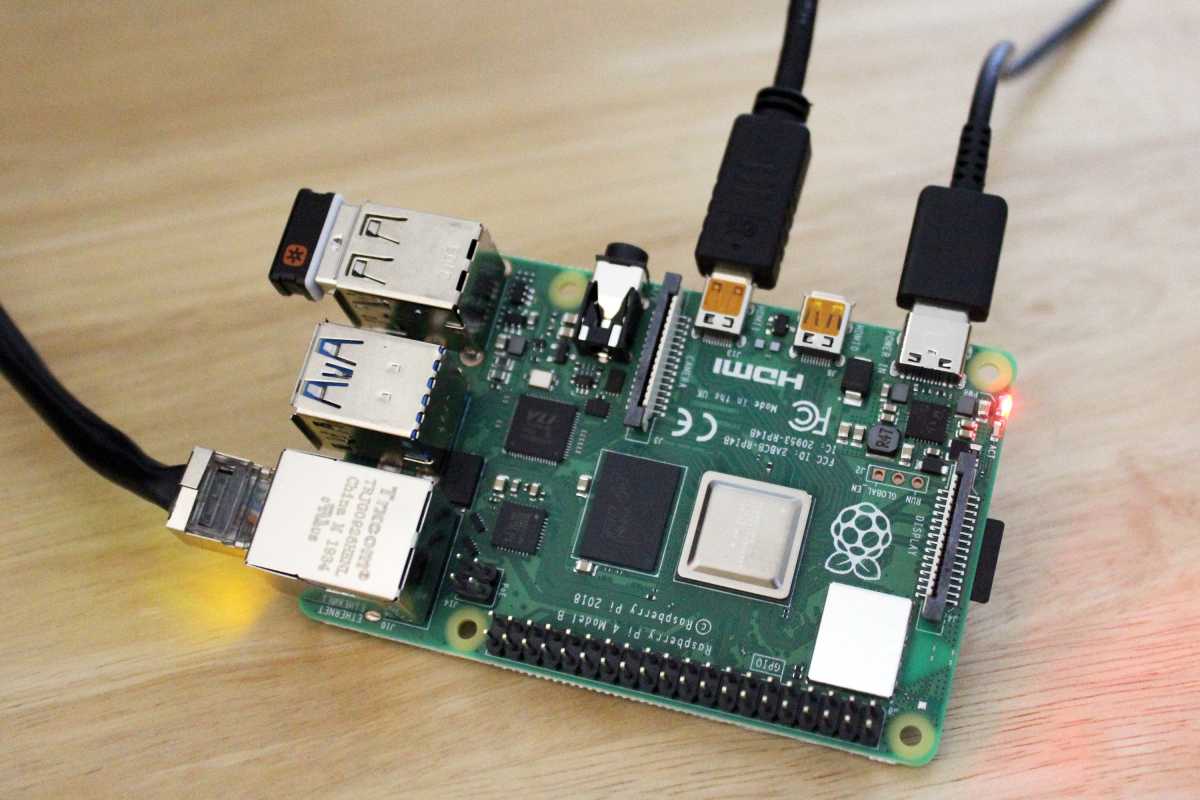
One of the best investments for board computers is the purchase of a solid case. Basic cases are available, but consider the intended use for your Raspberry Pi. If the small computer has to work as a streaming machine or file server, it has a lot to do. That’s why a case with a heat sink for passive cooling or an active fan is recommended.
The latter costs a little more electricity, but prolongs life. The enclosure also protects against dust, which affects cooling, and prevents short circuits if you tinker with it while the computer is running or accidentally touch a conductor to a contact.
Ensure a solid power supply
If your Raspberry Pi regularly crashes during operation, or if artifacts or colored stripes appear on a connected screen, suspicion quickly falls on the software used. In our experience, however, most problems simply result from an unsuitable power adapter. You do not have to buy the official power adapter, but you should use a power adapter from a known manufacturer and also use a high-quality USB cable.
Problems with the power supply are also signaled by the computer at start-up, which requires a particularly large amount of power. If there are bottlenecks, a small colored square will appear on the connected screen. If the red LED goes out or flashes, the power supply is not stable.
You can buy Raspberry Pi starter kits that include a case, sufficient power supply, heat sinks, and more, as well as the board itself.
My Raspberry Pi won’t start
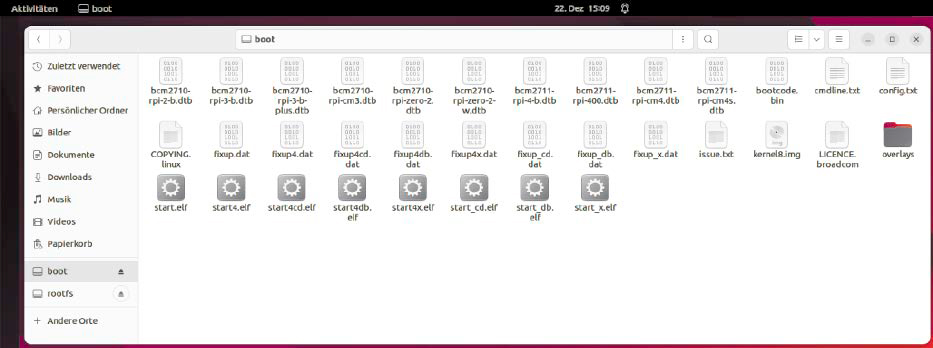
When your Raspberry Pi first starts up and won’t boot, you probably made a mistake when installing the operating system. If you use a program like Pi Imager or Etcher, you should always use the function that checks the files again after writing. Load the SD card into a reader on another system and check whether there is a “boot” folder on it. The files “start.elf” and “kernel.img” must be in it. If they are missing, re-install the operating system. If there are no problems, try another memory card.
If the system ran with the SD card until now, the file system or one of the start-up files may have been damaged.
The simplest solution: Transfer the system again and start a fresh installation. To save yourself the trouble of setting up a new system in the future, make a copy of the card after a successful installation and a test run:
sudo dd if=/dev/sdd of=~/raspberry-pi.imgAdjust the device name (“sdd” above). With the command in the opposite direction, you can simply restore the backup later.

If the system no longer starts, check the SD card for the existence of the important start-up files.
If the system no longer starts, check the SD card for the existence of the important start-up files.
IDG
If the system no longer starts, check the SD card for the existence of the important start-up files.
IDG
IDG
Raspberry Pi simply crashes
Sudden crashes lead to the suspicion that the software is freaking out. If there are no abnormalities in the log files and problems with the power supply can be ruled out, thermal problems or an overload at the USB port may play a role. Thermal problems always arise when PCBs are stuck in a housing that is too narrow and does not provide enough cooling. Overclocking also produces a lot of heat. Maybe you activated overclocking at some point and forgot to turn it off again? In order to operate the Raspberry Pi with the default CPU frequency again, check whether the entry “arm_freq” is commented out in the file “config.txt”.
Another reason for Raspberry Pi crashes could be a lack of RAM. The USB driver consumes a lot of RAM, for example. If your USB interface is under heavy load, this can lead to the system lacking RAM elsewhere. In the file “/etc/sysctl.conf” you can try to set the value under “vm.min_ free_kbytes” higher.
If the problem continues to occur, a change in the line
smsc95xx.turbo_mode=Nin the file “/boot/cmdline.txt” could lead to success. However, the network throughput is reduced with this setting. You are therefore buying higher stability with lower network performance.
Raspberry Pi screen remains dark
If a connected monitor remains dark while the Raspberry Pi seems to boot normally, check the mechanical cable connection. Especially with the small micro-HDMI sockets of the latest Raspberry Pi generations, there is sometimes enough strain on the cord to dislodge it and lose the connection. You could also try using the second micro-HDMI socket.
If that doesn’t work, some manual work is needed. Since the Pi does not have a BIOS in the usual sense, you can make the changes to the settings files, which you can access with any editor on another system. Open the file “config.txt” on the SD card with a text editor of your choice. Add the line
hdmi_safe=1Save the file and insert the card again. Try to start the system with this setting.
Artifacts or colorful stripes on the display?

A text editor will do: As in the case of signal amplification at the HDMI port, you can do a lot of fine tuning in the configuration files.
A text editor will do: As in the case of signal amplification at the HDMI port, you can do a lot of fine tuning in the configuration files.
IDG
A text editor will do: As in the case of signal amplification at the HDMI port, you can do a lot of fine tuning in the configuration files.
IDG
IDG
If colorful pixels appear on the monitor in the upper right corner, this is a signal for insufficient power supply. If, on the other hand, veils or clearly visible pixels appear, it is probably due to an HDMI cable that is too long. A cable that may work on a desktop PC or notebook can create too much resistance on the Raspberry Pi.
If you do not have a shorter HDMI cable at hand, amplify the signal with the settings in the “Control Panel.” Open the already mentioned file “config. txt” again and change the value of “config_hdmi_boost”. Values between 1 and 7 are permitted here. First try a medium value such as “4”. In most cases, this will help.
Check help sources
We had to limit ourselves to the most common sources of errors for this article. If your problem was not listed or no solution worked, look for further help on the Internet.
The official documentation at www.raspberrypi.com/documentation offers extensive material on all Raspberry models. There you will also find, for example, a table explaining the meaning of the different types of LED flashing. You will also find a complete reference of all commands in the configuration files.
Even more background material and especially the listing of problems of other users (in English) can be found in the Wiki of elinux.org. Users of other boards will also find help and tips there.
This article was translated from German to English and originally appeared on pcwelt.de.


