How to enable (and disable) Google's SmartSearch Browsing filter


Google Search’s SafeSearch Browsing feature filters out explicit content from your search results. This feature is enabled by default for account holders who are under 13 years of age. Otherwise, you’ll need to manually enable this setting. Here’s how you can enable (or disable) it.
Note that the Google SafeSearch filter only filters explicit content from Google Search–it doesn’t work for other browsers. Also, the setting is reflected on every device your account is on. So, if you enable or disable SafeSearch Browsing on your mobile device, that will also be reflected next time you use Google Search on your desktop when you’re logged in to your account.
Enable (or disable) SafeSearch Browsing on Google search for desktop
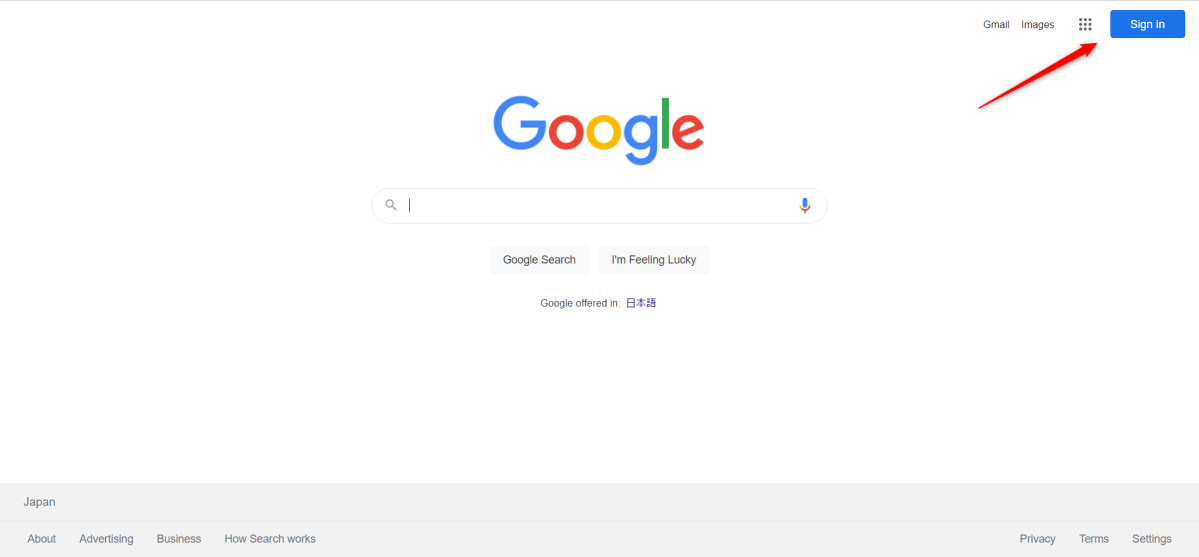
To turn on Google Search’s SafeSearch Browsing feature on your desktop (Windows, Mac, and Linux), open any web browser on your computer and go to Google Search. If you’re not already logged in to your account, click the blue “Sign In” button in the top-right corner of the account to log in.
Marshall Gunnell/IDG
Marshall Gunnell/IDG
Marshall Gunnell/IDG
Once you’re logged in to your account, click “Settings” in the bottom-right corner of the screen, and then select “Search Settings” from the menu that appears.

Marshall Gunnell/IDG
Marshall Gunnell/IDG
Marshall Gunnell/IDG
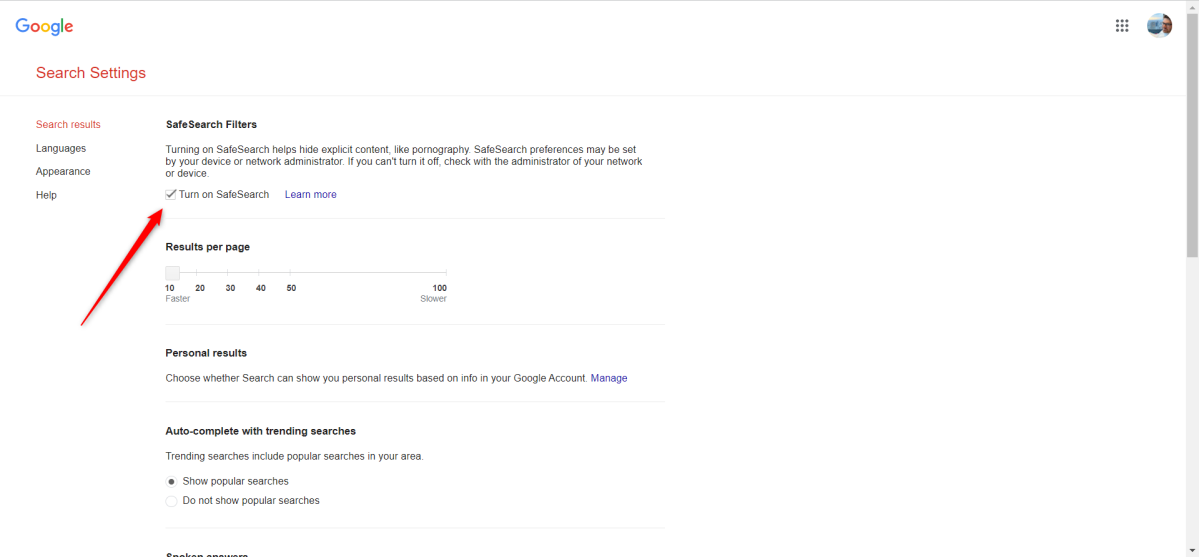
You’ll now be on the Search Settings screen. In the SafeSearch Filters group at the top, check the box next to “Turn on SafeSearch” to enable it. To disable it, simply uncheck the box next to this option.
Marshall Gunnell/IDG
Marshall Gunnell/IDG
Marshall Gunnell/IDG
Click the blue “Save” button at the bottom of the screen to save these changes. A prompt will appear confirming the changes.
Enable (or disable) SafeSearch Browsing on Google Search for mobile
There are two ways you can also enable or disable Google Search’s SafeSearch Browsing feature from your mobile device–via the Google app or Google Chrome app.
Using the Google App
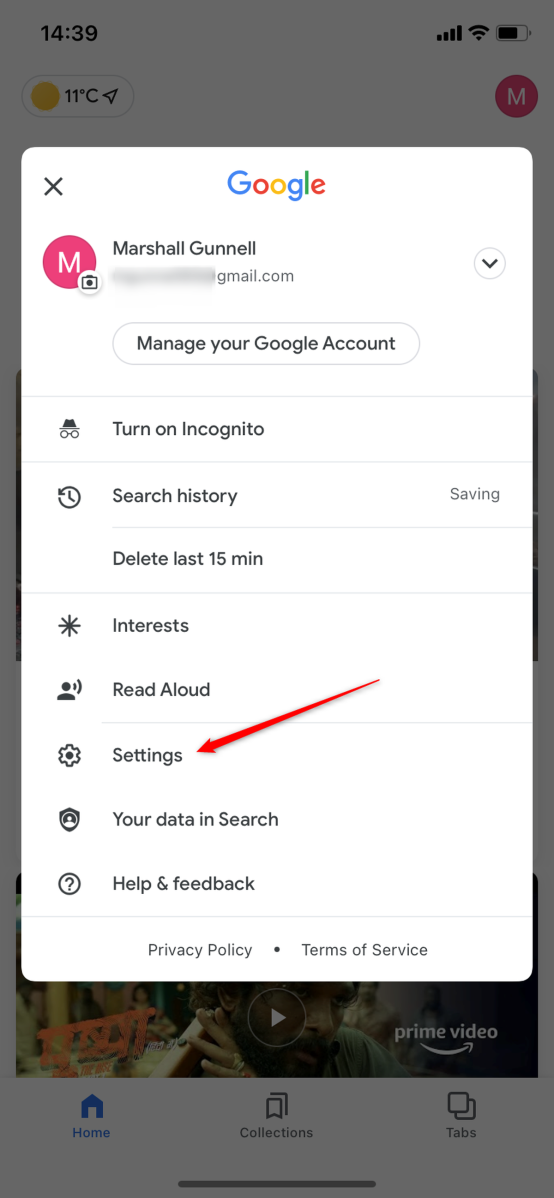
If you’re using the Google app for iOS or Android, launch the app and then tap your profile image (or initials) in the top-right corner of the screen.

Marshall Gunnell/IDG
Marshall Gunnell/IDG
Marshall Gunnell/IDG
Next, tap “Settings” from the menu that appears.
Marshall Gunnell/IDG
Marshall Gunnell/IDG
Marshall Gunnell/IDG
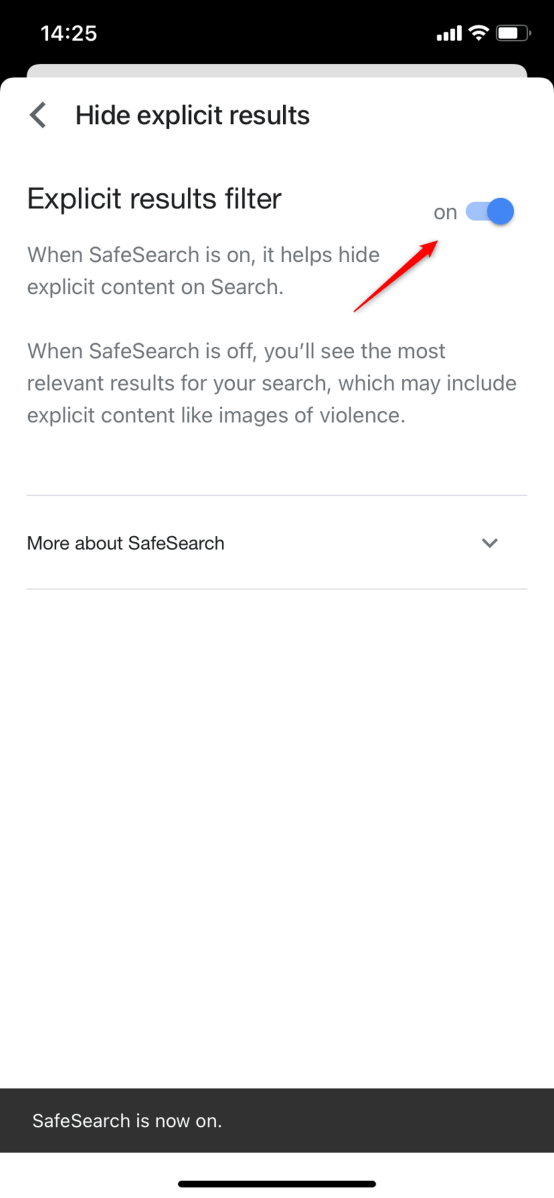
You’ll now be at the Settings menu. Tap “Hide Explicit Results” near the top of the menu.
Marshall Gunnell/IDG
Marshall Gunnell/IDG
Marshall Gunnell/IDG
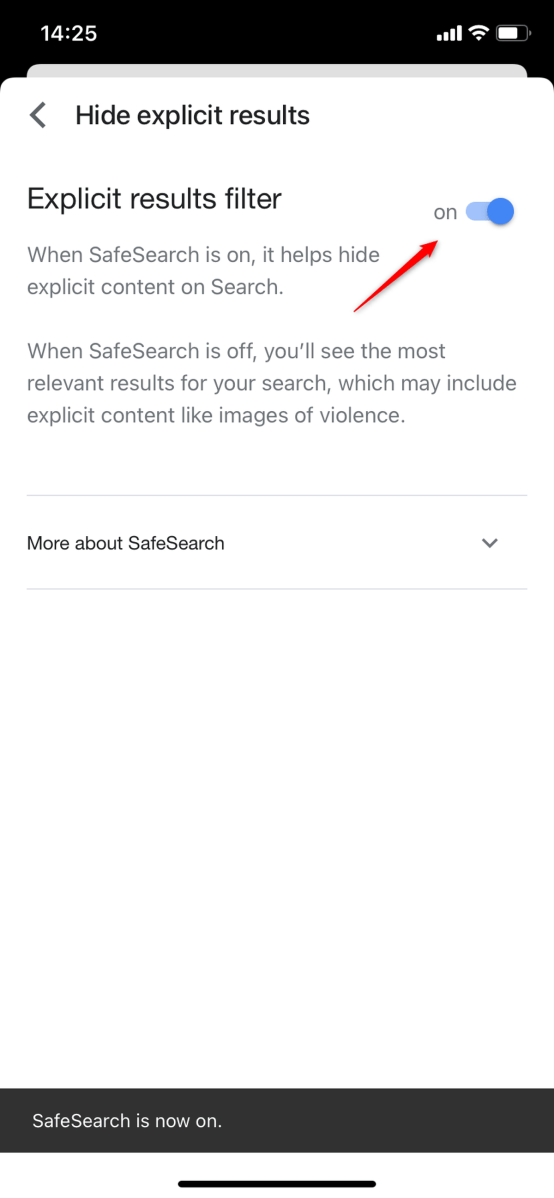
Toggle the slider to the “On” position to enable SafeSearch Browsing, or to the “Off” position to disable it.
Marshall Gunnell/IDG
Marshall Gunnell/IDG
Marshall Gunnell/IDG
The settings are automatically reflected.
Using the Google Chrome App
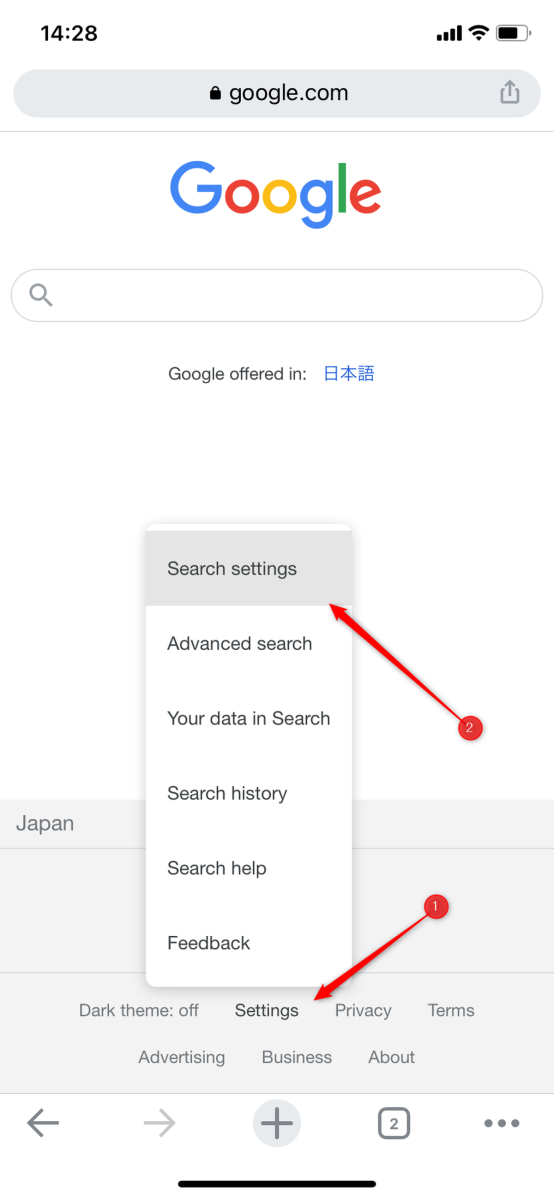
If you’re using the Google Chrome (or any web-browsing app, really), launch the app and then navigate to the Google Search web page. At the bottom of the screen, tap “Settings” and then select “Search Settings” from the menu that appears.
Marshall Gunnell/IDG
Marshall Gunnell/IDG
Marshall Gunnell/IDG
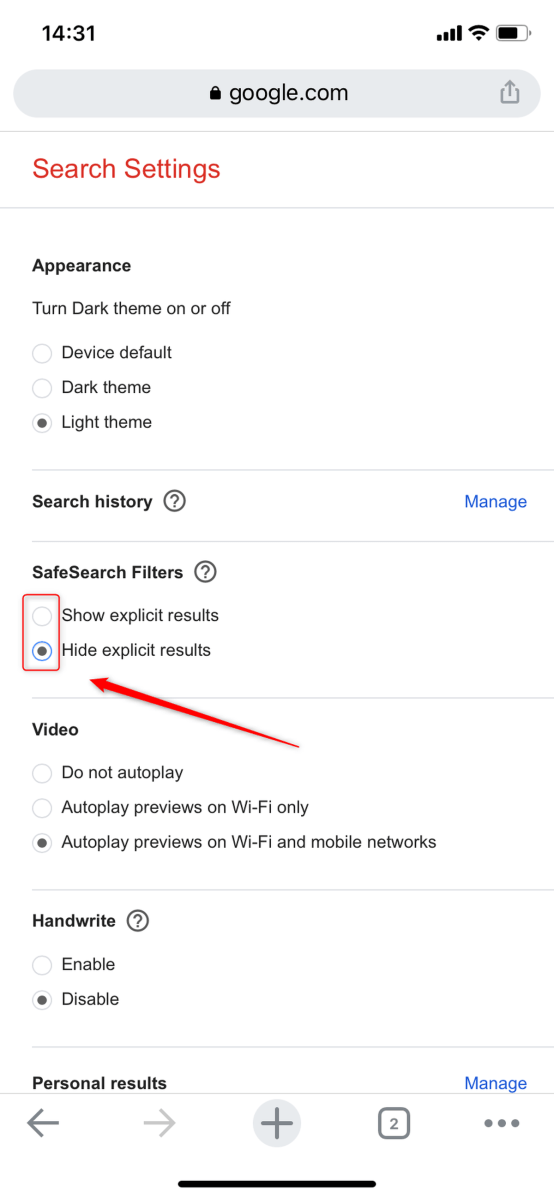
In the SafeSearch Filters group, tap the bubble next to “Hide Explicit Results” to enable SafeSearch Browsing, or “Show Explicit Results” to disable it.
Marshall Gunnell/IDG
Marshall Gunnell/IDG
Marshall Gunnell/IDG
Scroll down to the bottom of the screen and tap the blue “Save” button. A dialogue will appear confirming the changes have been saved.
Author: Marshall Gunnell
Recent stories by Marshall Gunnell:
Best web hosting services 2023: Expert picks and adviceHow many websites are on the Internet?DigitalOcean review: Scalable, customizable web hosting for businesses


