How to do a hanging indent in Google Docs

 Image: Lamai Prasitsuwan / Shutterstock / Google
A hanging indent is required for your works cited, references page, or bibliography when writing in MLA or APA format. You can create a hanging indent in Google Docs in just a few simple steps.
Create a hanging indent with the Formatting option
One way to create a hanging indent in Google Docs is by using the formatting option in the header menu. To get started, highlight the text you want to create a hanging indent on by clicking and dragging your cursor over the text.
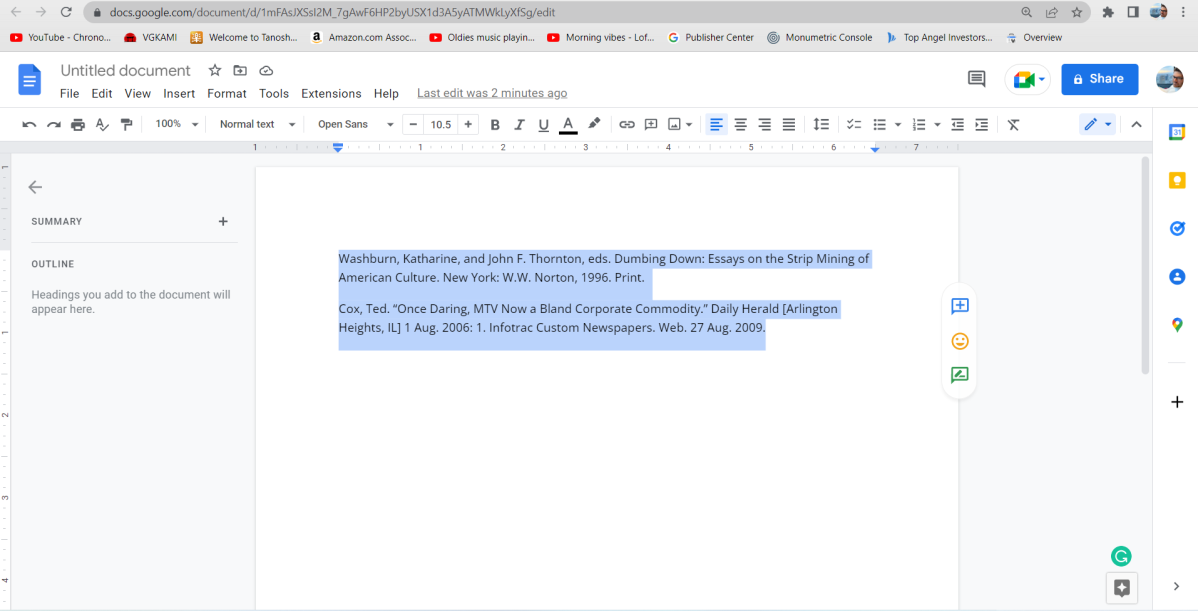
Highlight text in Google Docs.
Highlight text in Google Docs.
Marshall Gunnell
Highlight text in Google Docs.
Marshall Gunnell
Marshall Gunnell
Next, click “Format” in the header menu. In the drop-down menu that appears, hover your cursor over “Align & Indent” and then select “Indentation Options.”
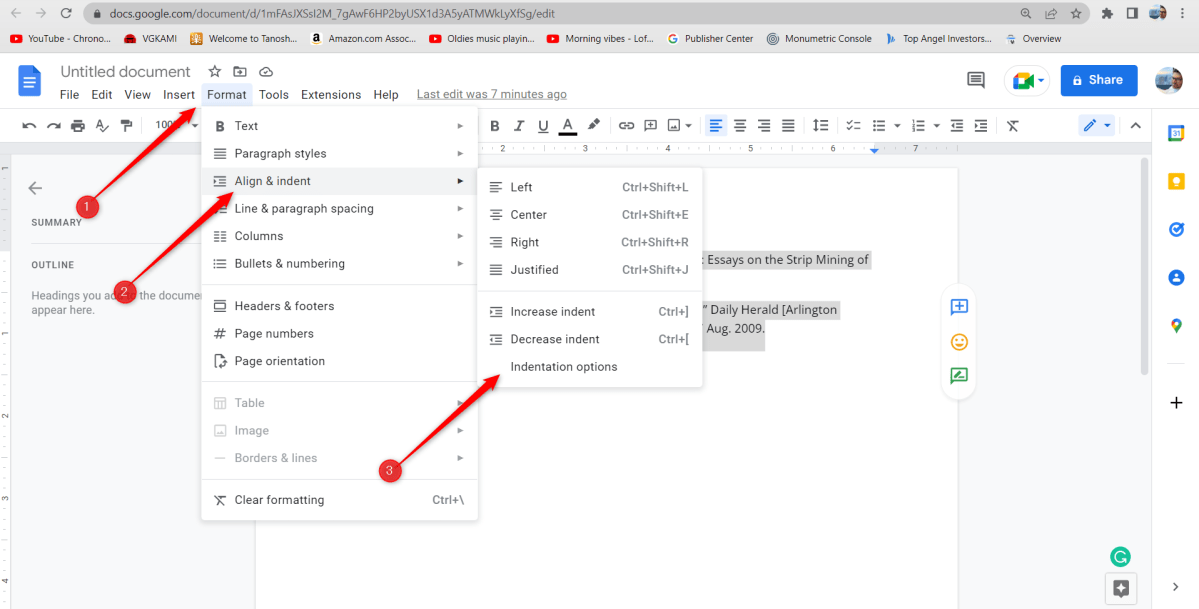
Select “Indentation Options”.
Select “Indentation Options”.
Marshall Gunnell
Select “Indentation Options”.
Marshall Gunnell
Marshall Gunnell
The Indentation Options window will appear. In the Special Indent group, change the indent type to “Hanging.” You can then set the length of the indent, which is 0.5 by default. Once ready, click “Apply.”
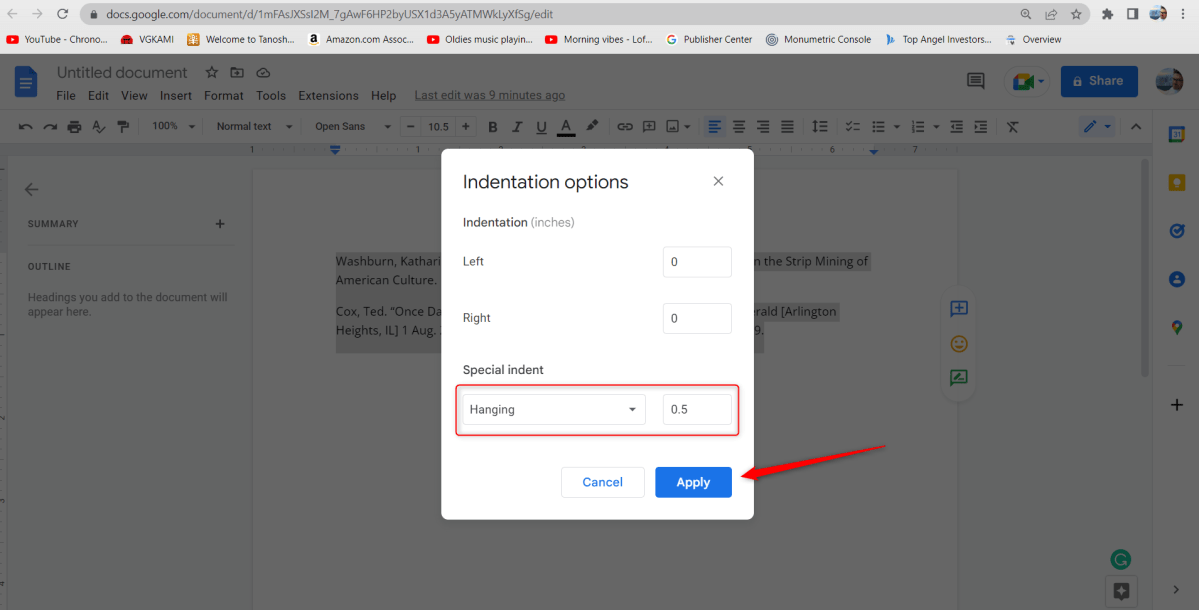
Set the hanging indent.
Set the hanging indent.
Marshall Gunnell
Set the hanging indent.
Marshall Gunnell
Marshall Gunnell
The hanging indent is now applied to the highlighted text.
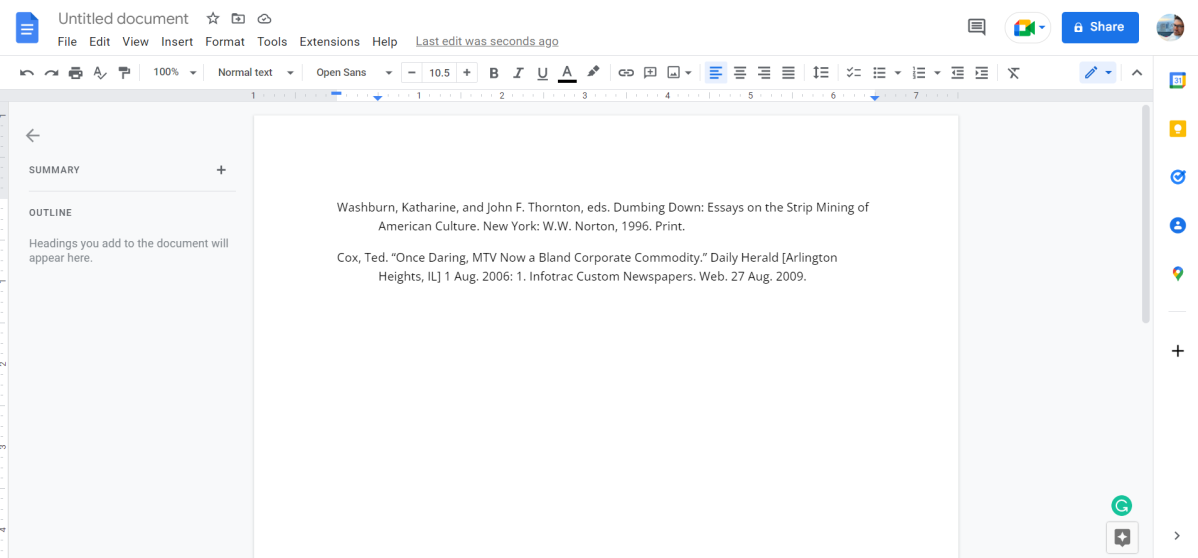
A hanging indent at 0.5.
A hanging indent at 0.5.
Marshall Gunnell
A hanging indent at 0.5.
Marshall Gunnell
Marshall Gunnell
Related: How to use voice dictation in Google Docs
Create a hanging indent with the Ruler
You can also create a hanging indent using the ruler in Google Docs. If the ruler isn’t already displayed under the header menu, select “View” from the header menu and then select “Show Ruler.”
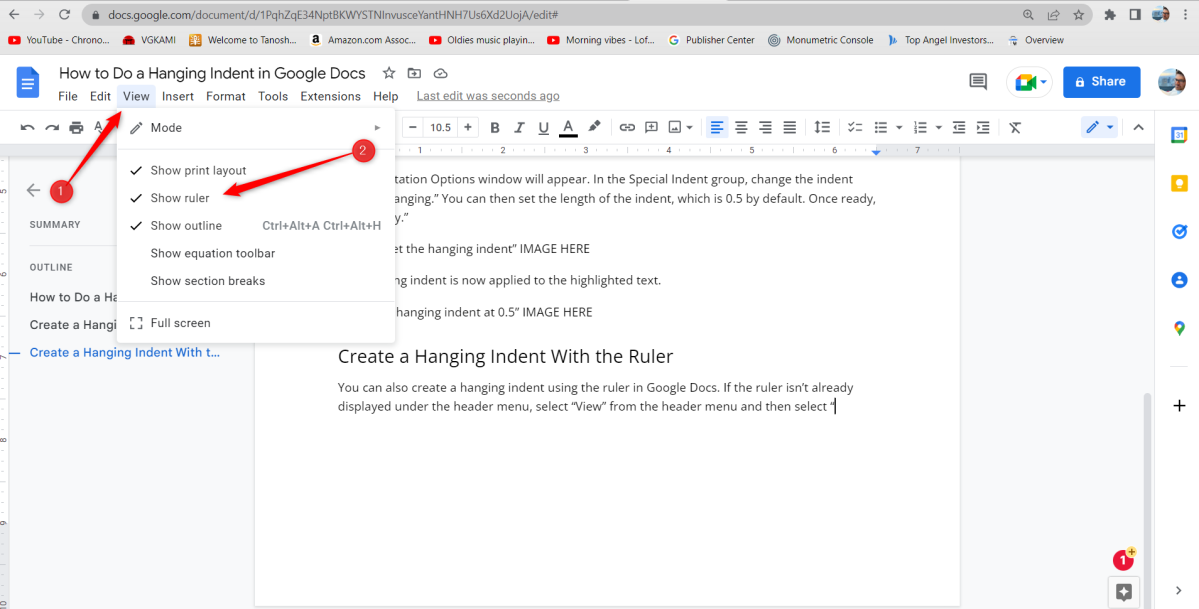
Show the ruler in Google Docs.
Show the ruler in Google Docs.
Marshall Gunnell
Show the ruler in Google Docs.
Marshall Gunnell
Marshall Gunnell
Once the ruler is displayed below the header menu, highlight the text you want to create a hanging indent on by clicking and dragging your cursor over the text.
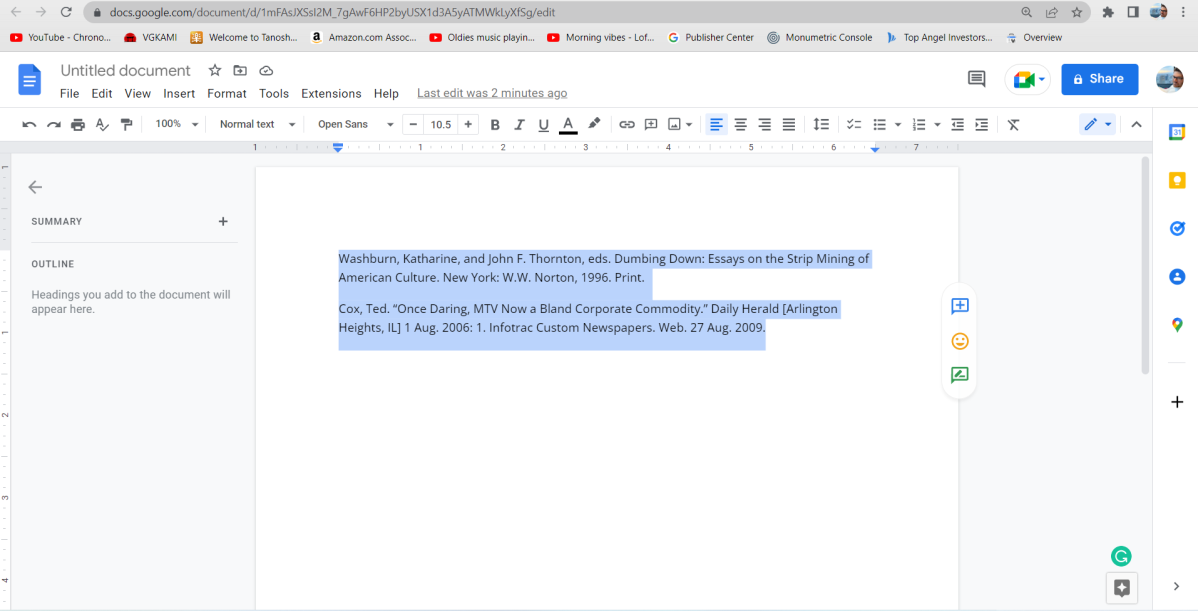
Highlight text in Google Docs.
Highlight text in Google Docs.
Marshall Gunnell
Highlight text in Google Docs.
Marshall Gunnell
Marshall Gunnell
Now it’s time to adjust the indent, but there are a few things you need to know about using the ruler first. The slider on the ruler has two elements: the First Line Indent which is the solid blue line and the Left Indent which is the bottom arrow. You can click and drag these elements to change the indent. However, while the solid blue line can be moved independently, if you try to move the arrow then the blue line will move with it.
That said, you’ll first need to drag the blue arrow to the right, and then drag the blue line back to the left.
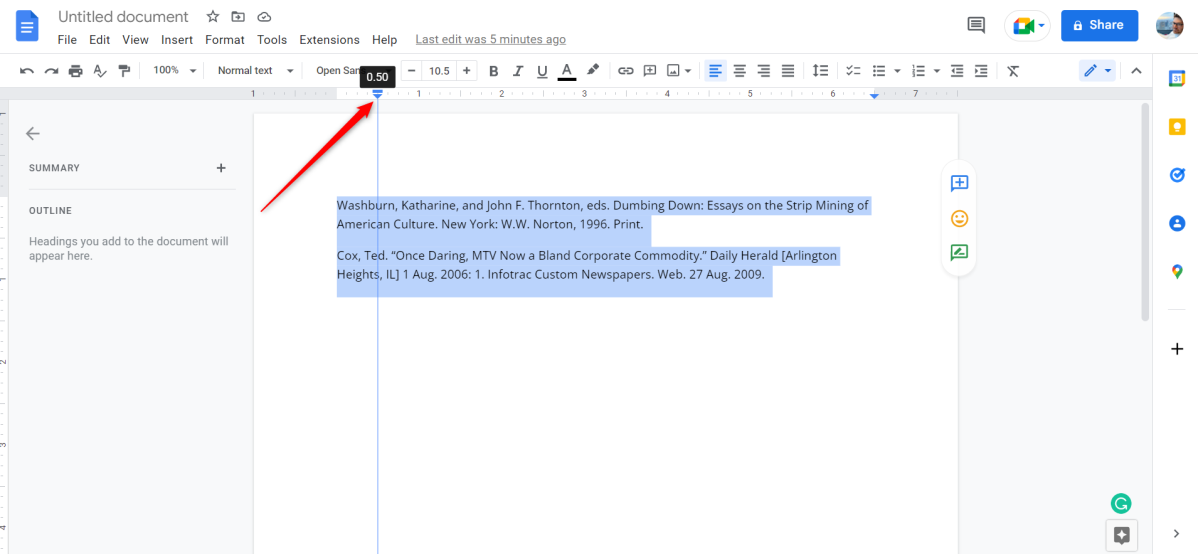
Drag the blue arrow across the ruler.
Drag the blue arrow across the ruler.
Marshall Gunnell
Drag the blue arrow across the ruler.
Marshall Gunnell
Marshall Gunnell
The selected text will move to the position of the slider. Next, click and drag the blue line back to the starting position.
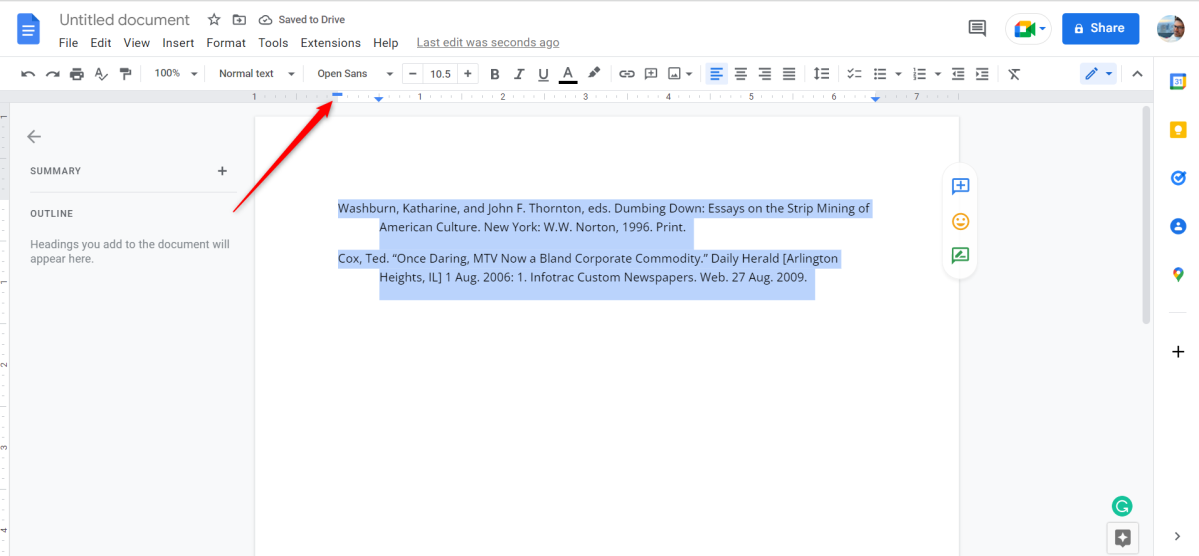
Now you have a hanging indent created with the ruler.
Now you have a hanging indent created with the ruler.
Marshall Gunnell
Now you have a hanging indent created with the ruler.
Marshall Gunnell
Marshall Gunnell
Your hanging indent is now ready.
Related: How to track changes in Google Docs


