How to fix stick drift on the Steam Deck

 Image: Keith May/IDG
If there are two words that strike fear into the heart of every gamer, they’re “stick drift.” This dreaded hardware failing on analog sticks has been the bane of many a controller, notably the Nintendo Switch’s Joy-Cons, and unfortunately it’s a rare but confirmed issue for the Steam Deck as well. Stick drift happens when you’re not touching the analog stick at all, but it still transmits “movement” to the game.
But since Valve has made the Deck so friendly to user modifications, there’s a solution. A third-party parts supplier called GuliKit is selling inexpensive hall effect analog sticks for the Steam Deck. The hall effect design replaces parts that physically contact each other with a series of magnets and sensors, making them far more long-lasting and — yes! — immune to the stick drift problem.
If you have a few bucks, the right tools, and a little courage, you can replace the default Steam Deck analog sticks with these upgraded ones. PCWorld contributor Keith May shows us how on our latest YouTube video.
Before you start, you’ll need a few basic tools. Get a spudger, a series of guitar picks, or some other means of gently prying the case apart — a pocket knife will do in a pinch, but it’s not ideal. You’ll also want a Phillips-head screwdriver (cross, not flat) and a pair of tweezers. (Incidentally, you can get all of these in an iFixit tool kit, one of our favorite gifts for nerds.) A soldering iron is optional for advanced electronics users. After removing the eight screws from the rear of the case, you can crack the case open with your spudger, removing the rear shell — you don’t need to get the top off.
With the rear interior of the Steam Deck exposed, you should be able to see the right and left stick modules immediately, held in place by three screws each. Use your tweezers to lift up the protective flap on the ribbon cable, then remove the screws. With those four points of contact removed, the analog stick should pull right out with a little pressure from the underside (the front of the Steam Deck). Repeat the process with the other stick.
With the modules removed, you need to take the analog sticks themselves off of the old modules and onto the new ones. The sticks are connected to the modules with a tiny red cable which is soldered in place. This cable is solely for sensing when your thumbs are resting on the stick.
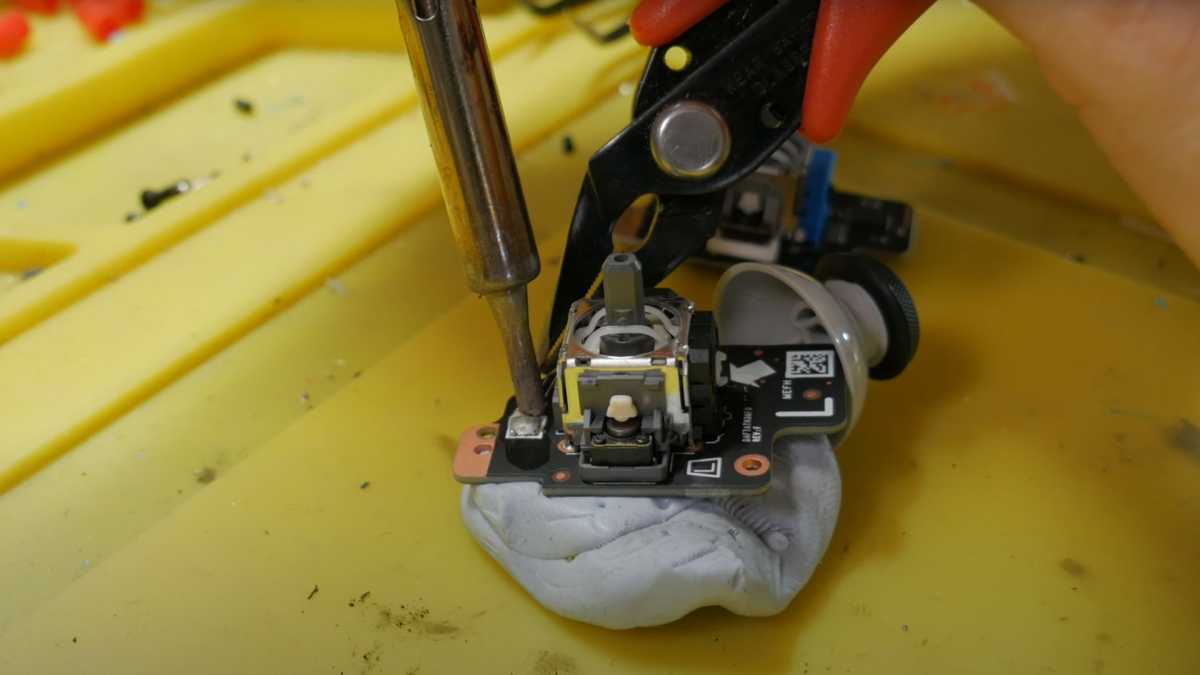
If you don’t care about this feature, you can cut or pull off the cable and the sticks will work just fine without that capability. If you want to preserve that function, then use your soldering iron to heat up the solder that’s in place on the old module and gently pull the exposed copper wire out of the solder. Re-solder the wire into the same spot on the replacement GuliKit module.

Soldering the plastic sticks to the new module is an advanced, but optional, step.
Soldering the plastic sticks to the new module is an advanced, but optional, step.
Keith May/IDG
Soldering the plastic sticks to the new module is an advanced, but optional, step.
Keith May/IDG
Keith May/IDG
Once you’ve placed the old plastic analog sticks on the new module’s circuit board, you’re ready to reassemble the Steam Deck. Simply place the completed sticks back into their spots on the housing (right to right, left to left, note the “R” and “L” printed on the back). Put the three screws back in, then re-attach the ribbon cable and lower the black protective flap. (Be careful with this step, it’s tricky, and the most likely issue if you’re having problems at the end of the process.) Repeat on the other side.
Replace the rear Steam Deck body panel and place the eight body screws back in, and you’re ready to go! Your Steam Deck now has upgraded, drone controller-style hall effect joysticks, and it’s 100 percent stick drift-proof. For more nerdy guides on how to make your gaming life better, be sure to subscribe to PCWorld on YouTube!
Author: Michael Crider, Staff Writer

Michael is a former graphic designer who’s been building and tweaking desktop computers for longer than he cares to admit. His interests include folk music, football, science fiction, and salsa verde, in no particular order.
Recent stories by Michael Crider:
Watch PCWorld build an invisible-cable desktop with Asus BTF partsThis weird Asus motherboard with SO-DIMM slots is an abominationWill’s PC is crashing on Fortnite — let’s fix it!


