Nvidia App tweaks: 5 changes every GeForce gamer should make ASAP

 Image: Adam Patrick Murray / IDG
Console gamers have a leg up on PC gamers when it comes to ease of use. Turn it on and your settings are mostly chosen for you with little fuss. From game to game, the overall experience is standardized — no need to worry if your PlayStation 5 can handle the latest releases.
As PC gamers, we may have more options, but that comes at a cost. There’s a real learning curve when it comes to configuring hardware and software to run games optimally, and developers have to play it safer as they’re forced to support a much wider range of specs. A game might not run on a given CPU and GPU combo, or if it does, it may run poorly.
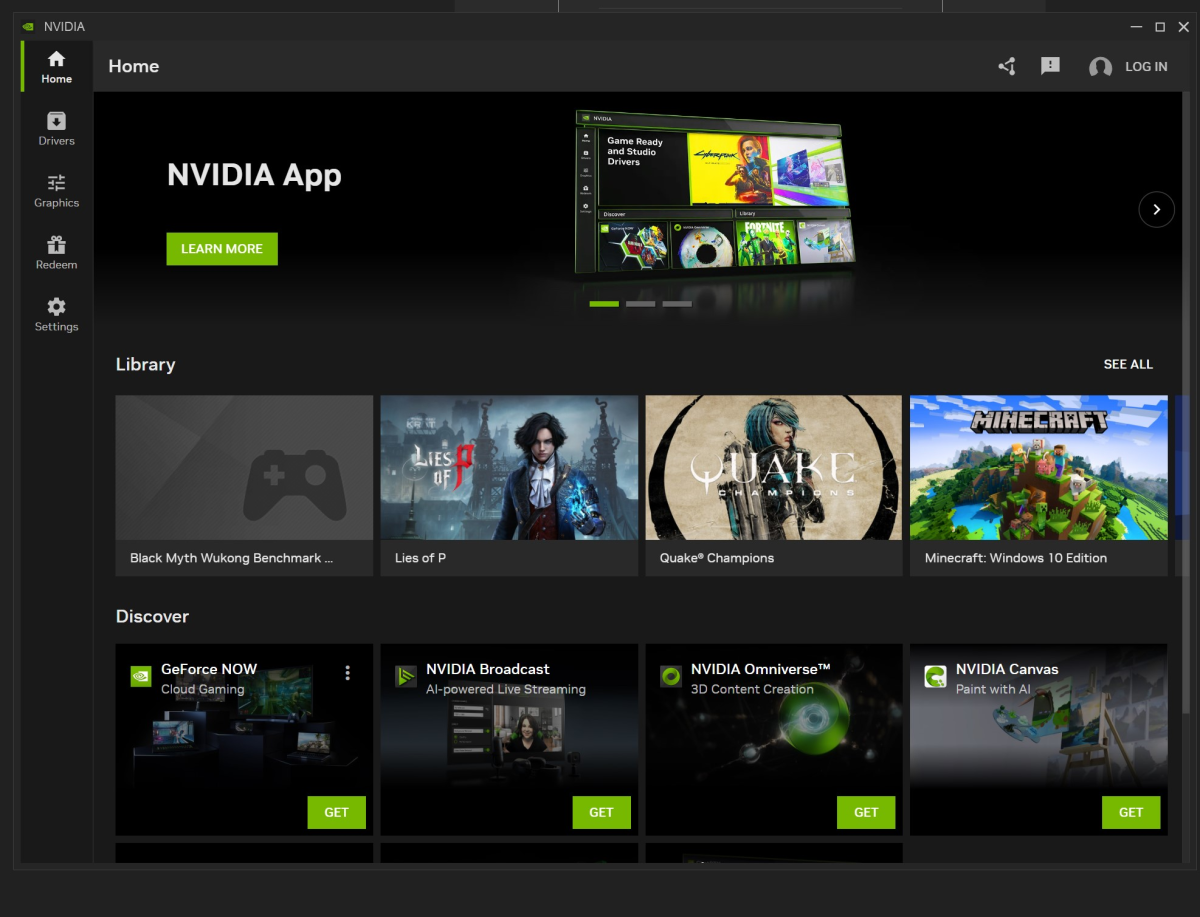
Enter the Nvidia App, the successor that combines both Nvidia Control Panel and Nvidia GeForce Experience into one cohesive tool that simplifies configuration options for GeForce gamers.

Thiago Trevisan / IDG

Thiago Trevisan / IDG
Thiago Trevisan / IDG
If you’re the kind of gamer who frequently dives into game settings and makes tweaks to boost performance, the Nvidia App is for you. You can fine tune basic settings (like resolution and graphical fidelity) up to more advanced options (like Nvidia’s DLSS).
Related: What is Nvidia’s DLSS 3? Explained
Of course, you’ll need an Nvidia GPU to make use of the Nvidia App. And depending on the age and model of your GPU, certain features may or may not be available to you. Even so, the Nvidia App really helps to streamline the PC gaming experience.

Thiago Trevisan / IDG

Thiago Trevisan / IDG
Thiago Trevisan / IDG
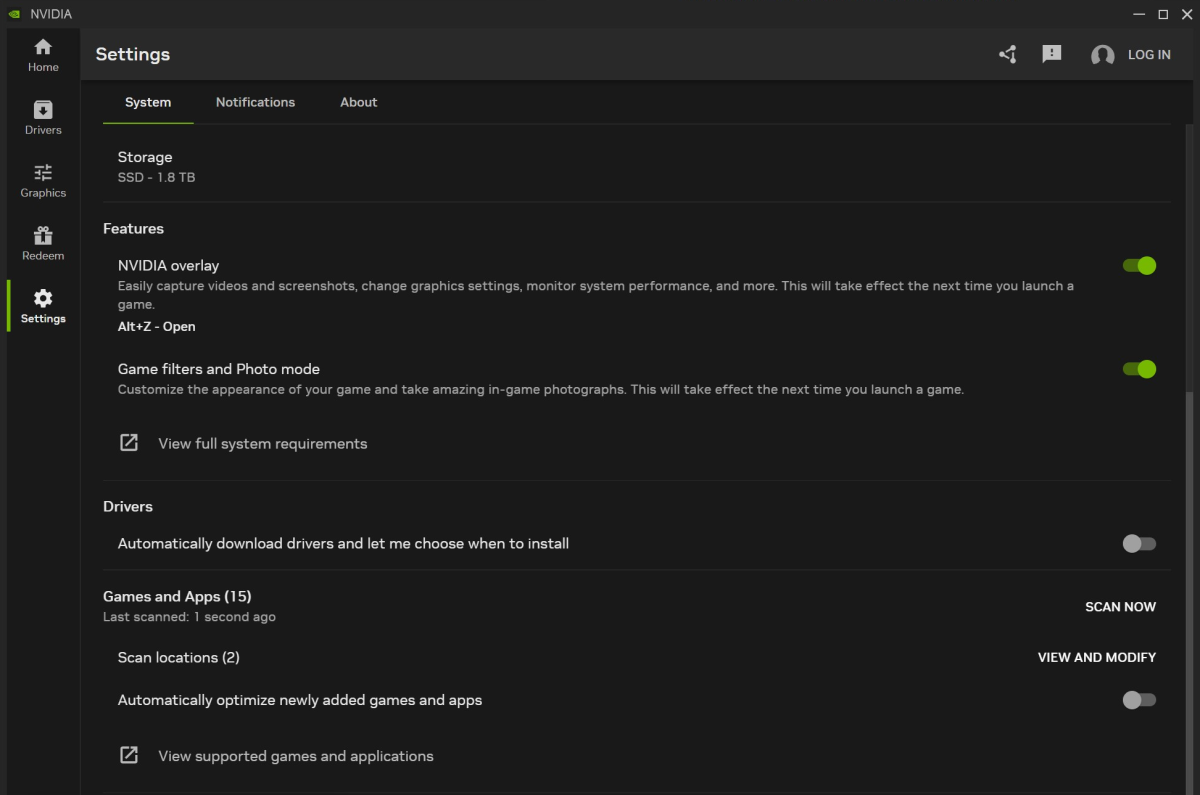
The most interesting part of the Nvidia, at least for me, is the unified GPU control center that offers unparalleled control over GPU settings.
As of this writing, the Nvidia App is still in beta. If you want to try it, just hop over to the download page and install it for free. It’s eventually replacing GeForce Experience, so you might as well get a head start!
Keep reading for some of the most crucial and impactful Nvidia App settings you need to know about, which are worth tweaking for the best PC gaming experience available to GeForce gamers right now.
Tip #1: Auto-optimize in-game settings
One cool feature of the Nvidia App is that it can analyze your PC hardware (e.g., CPU, GPU, display), then tap into the cloud to determine the best in-game settings for your system. Even if you’re tech-savvy, it’s a great way to establish a starting point for each game.
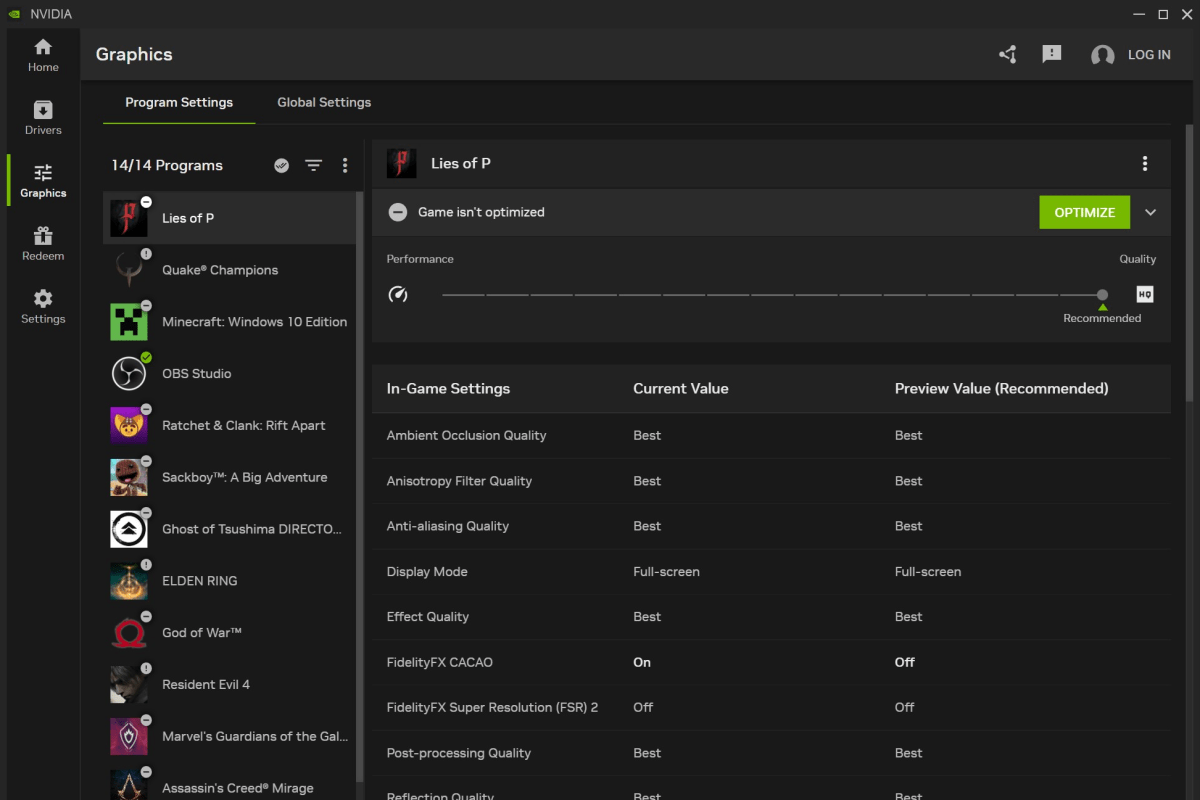
In the Graphics section of the Nvidia App, scan your library of installed games to automatically populate the list. Then, select the game you want to optimize and click the Optimize button at the top right:

Thiago Trevisan / IDG

Thiago Trevisan / IDG
Thiago Trevisan / IDG
Once a game has been optimized, you’ll be shown a convenient slider that lets you adjust how you want the game tweaked, with a spectrum starting with Performance on the left and Quality on the right. It’s a lot like how consoles have dual modes for games, except here you can achieve the same but with greater granularity.
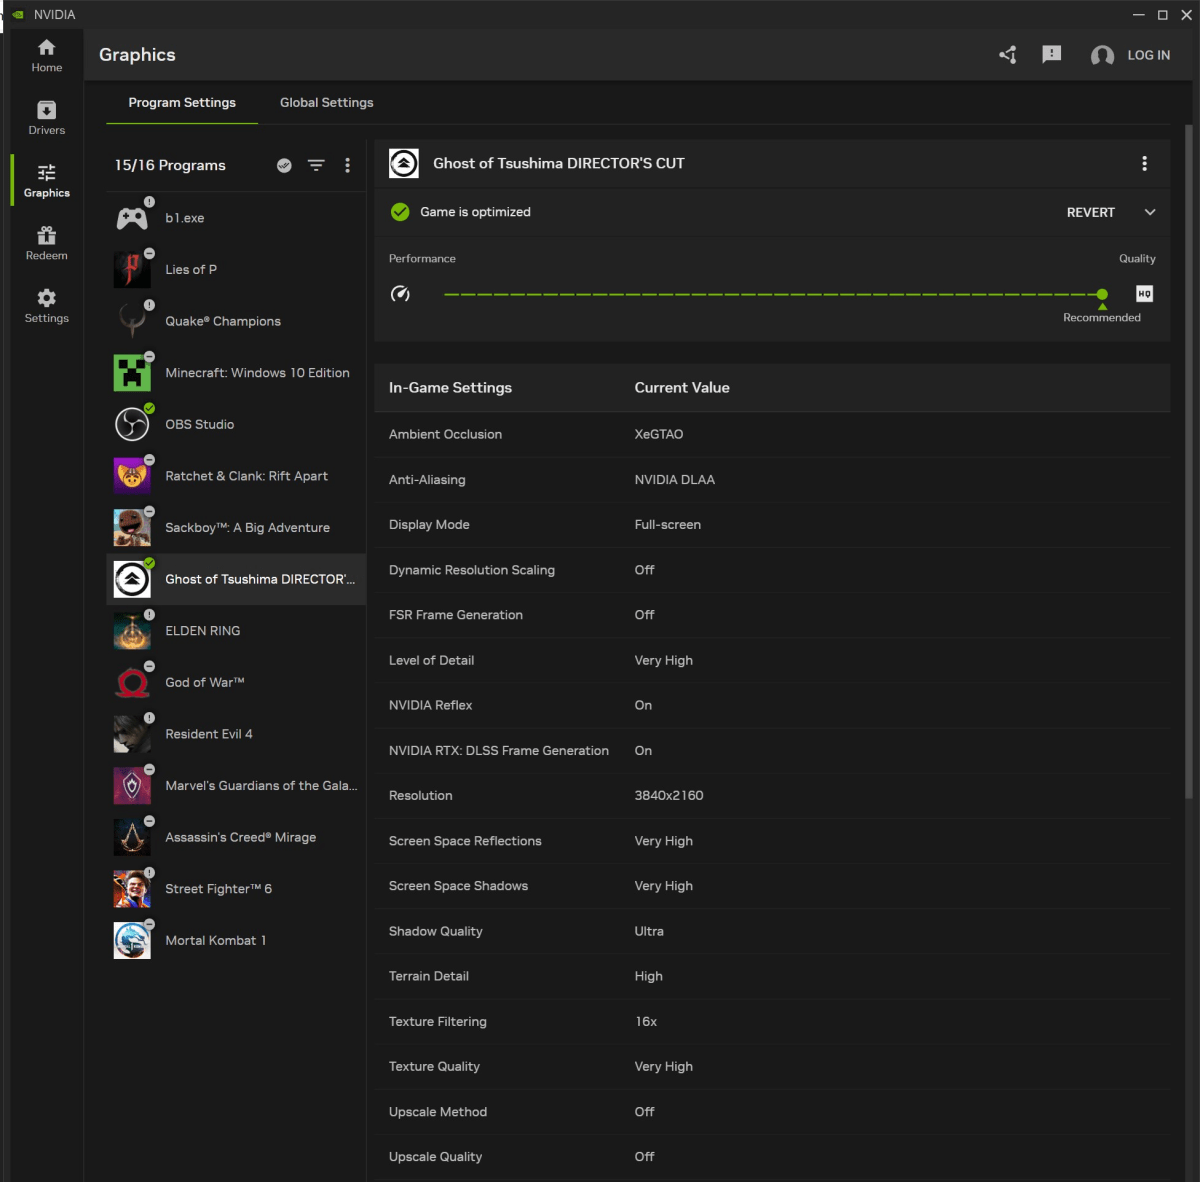
Let me show you a real example using Ghost of Tsushima: Director’s Cut. After optimizing, I moved my slider to the Quality end. (For context, my test PC is running an AMD Ryzen 7 7800X3D CPU and an Nvidia GeForce RTX 4080 GPU with games at 4K resolution.) Here it is:

Thiago Trevisan / IDG

Thiago Trevisan / IDG
Thiago Trevisan / IDG
The Nvidia App automatically chose the settings and options that I would have chosen if I wanted to maximize Quality to the extent supported by my system hardware. For example, it set the graphics to Very High. (In other games, it might’ve chosen Ultra if available.) It also turned on Nvidia RTX: DLSS Frame Generation, but went with Nvidia’s DLAA for anti-aliasing instead of DLSS. It also opted to enable Nvidia Reflex for lower latency coupled with the frame generation.
Related: How Nvidia Reflex can make you better at esports
The resulting frame rates hit well above 60 FPS for this game, averaging close to 80 FPS with these settings. Overall gameplay was smooth and graphics looked gorgeous. The only manual tweak I even considered making was to switch out DLAA for extra frames.
Related: What is Nvidia’s DLAA and how does it work?
The Nvidia App also provides a neat visual on the optimization page that shows current values and a preview of recommended values. This can help you fine tune the slider to reach a balanced set of settings that work for you. While not every game is supported, Nvidia is regularly updating the app with more gaming profiles.
Tip #2: RTX HDR and Dynamic Vibrance

Thiago Trevisan / IDG

Thiago Trevisan / IDG
Thiago Trevisan / IDG
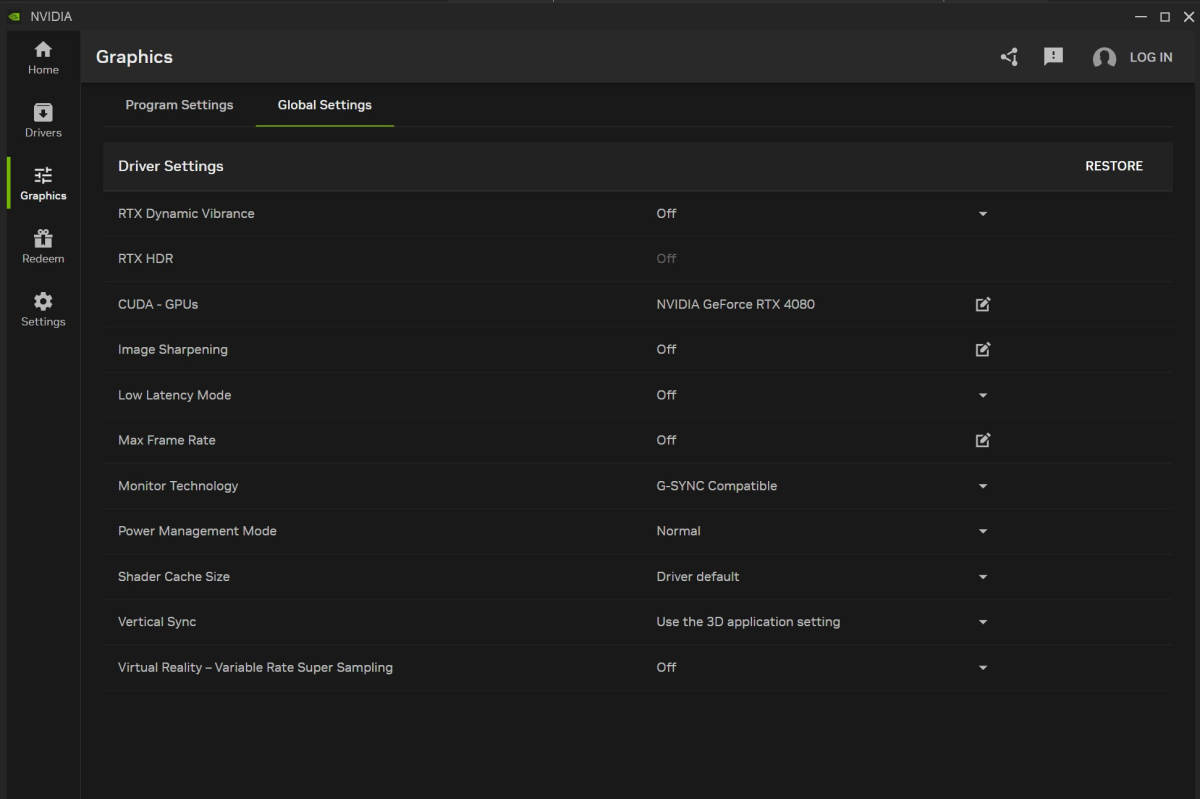
Individual in-game settings are great, but Nvidia also offers some global settings that apply to all your games. Found in the same “Graphics” section of the app, click the Global Settings tab.
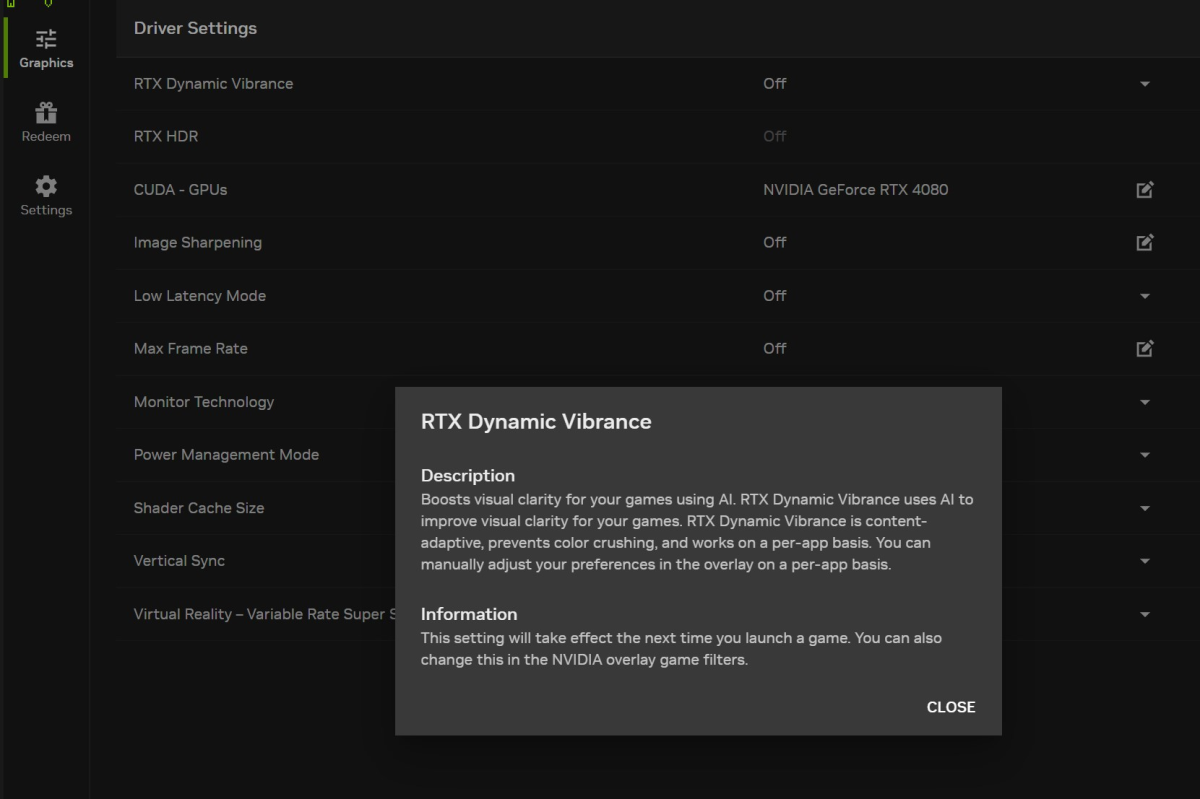
Here you can enable features like RTX Dynamic Vibrance, which uses AI to increase image clarity. It works differently depending on which game you’re in, but it always aims to give you a more vibrant look without distorting the colors too much.

Thiago Trevisan / IDG

Thiago Trevisan / IDG
Thiago Trevisan / IDG
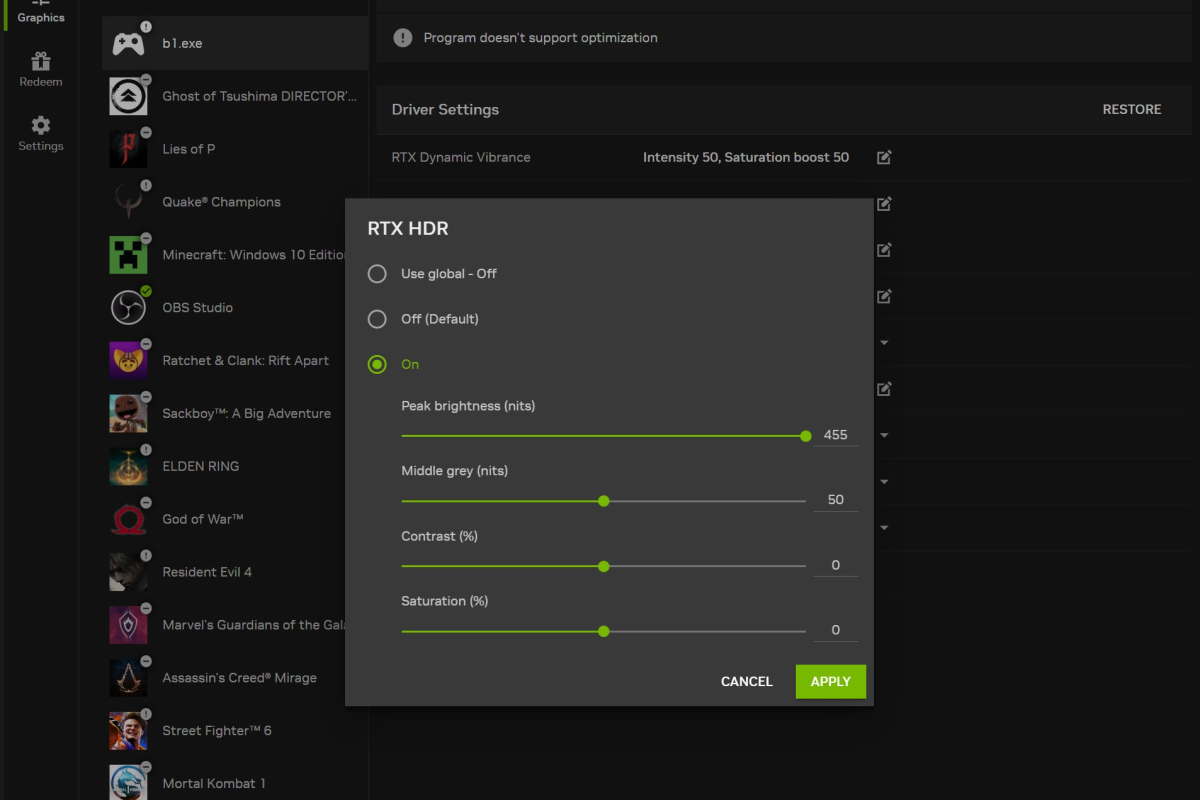
Another option you can enable in the Global Settings panel is RTX HDR, which can add HDR to games that don’t normally support it.
Windows 11 has a built-in feature called Auto HDR, but it can be hit or miss. Meanwhile, Nvidia’s RTX HDR uses AI to apply an HDR filter to any and all games (and it’s compatible with DirectX and Vulkan).

Thiago Trevisan / IDG

Thiago Trevisan / IDG
Thiago Trevisan / IDG
What I recommend is to enable HDR in Windows settings but leave Auto HDR disabled. (Those two things are different.) You’ll also want to disable in-game HDR settings so that RTX HDR can do its job.
You may have to further tweak and try different combinations to get the best results, but it’s nice to have additional options with RTX HDR.
Tip #3: Use the performance overlay
A performance overlay is an essential tool that should be in every gamer’s toolbox. Back when MSI Afterburner was more active, it was the go-to performance overlay app — but now that it has fallen by the wayside with a recent lack of updates, the Nvidia App can help fill the gap.
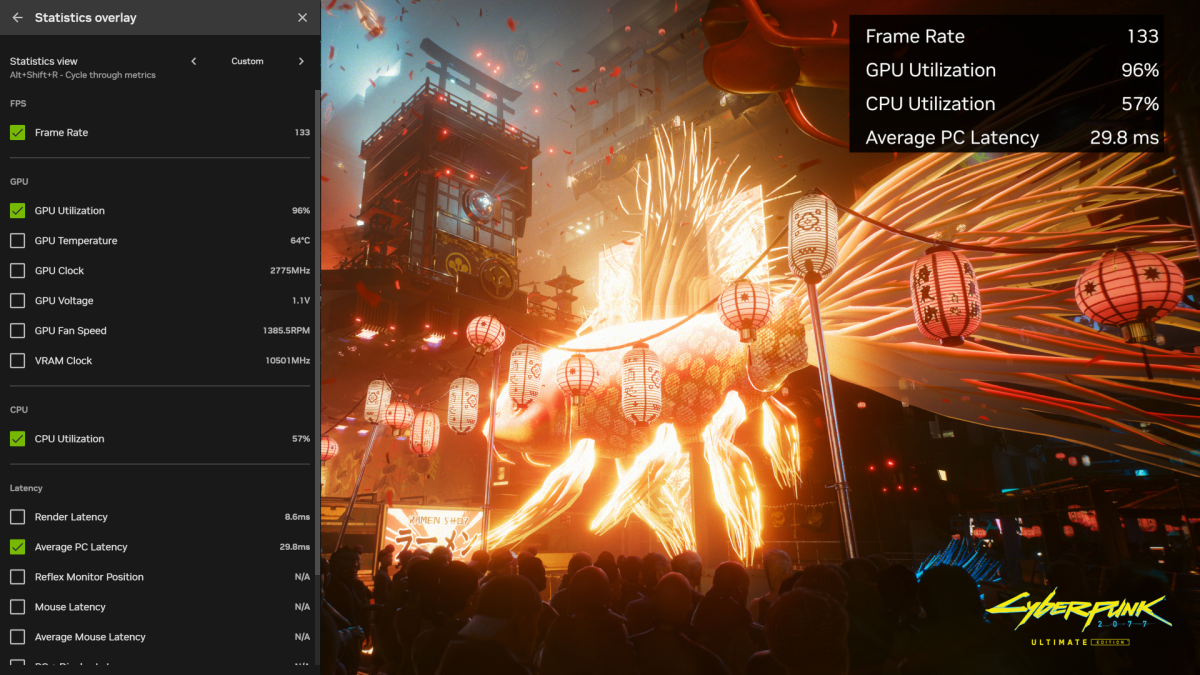
The Nvidia App has its own integrated performance overlay feature that can help you keep tabs on what’s going on as you game. With it enabled, you can analyze in real time how certain tweaks and changes to settings actually affect in-game FPS performance.

Nvidia

Nvidia
Nvidia
It can also be helpful for monitoring your system health and temperatures. For example, if a ray tracing setting has your GPU running wild, you may want to tweak it and see what happens to performance. Similarly, toggling resolution scalers (like DLSS) can also have an impact on how much your CPU is taxed. All of this can even help inform whether parts of your PC are in need of being upgraded.
To turn on the performance overlay in the Nvidia App, simply press the Alt + R hotkey. (Keep in mind that the Alt + Z hotkey opens other overlay features, such as ShadowPlay discussed below in the next tip.)
With the performance overlay active, you can choose which statistics are shown during gameplay. For example, you can opt to have only the frame rate, GPU utilization, temperature, and clock displayed. More technical details, like GPU voltage, could also be helpful to know.
Related: How to benchmark your GPU
Average PC latency and other latency-related metrics can be instrumental for getting a glimpse of how your system is performing, and it could show you whether you’d benefit from global settings like Low Latency Mode.

Nvidia

Nvidia
Nvidia
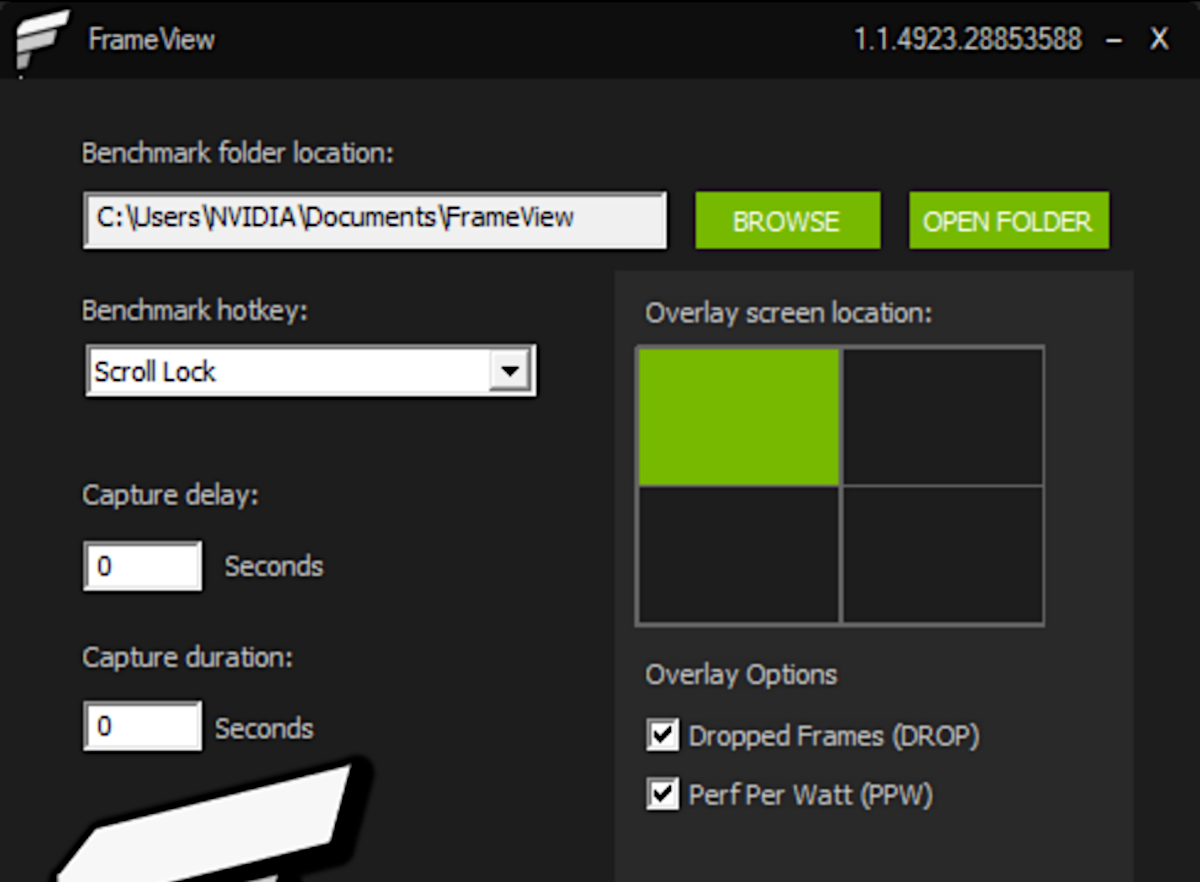
Note that Nvidia also has another app called FrameView, which can be downloaded separately and integrated into the Nvidia App. FrameView also provides details on system metrics and average frame rates.
This combination of FrameView and Nvidia App can be helpful when playing in different areas of certain games, to see the impact on hardware performance when a game doesn’t have a built-in benchmark.
Tip #4: Record and stream gameplay
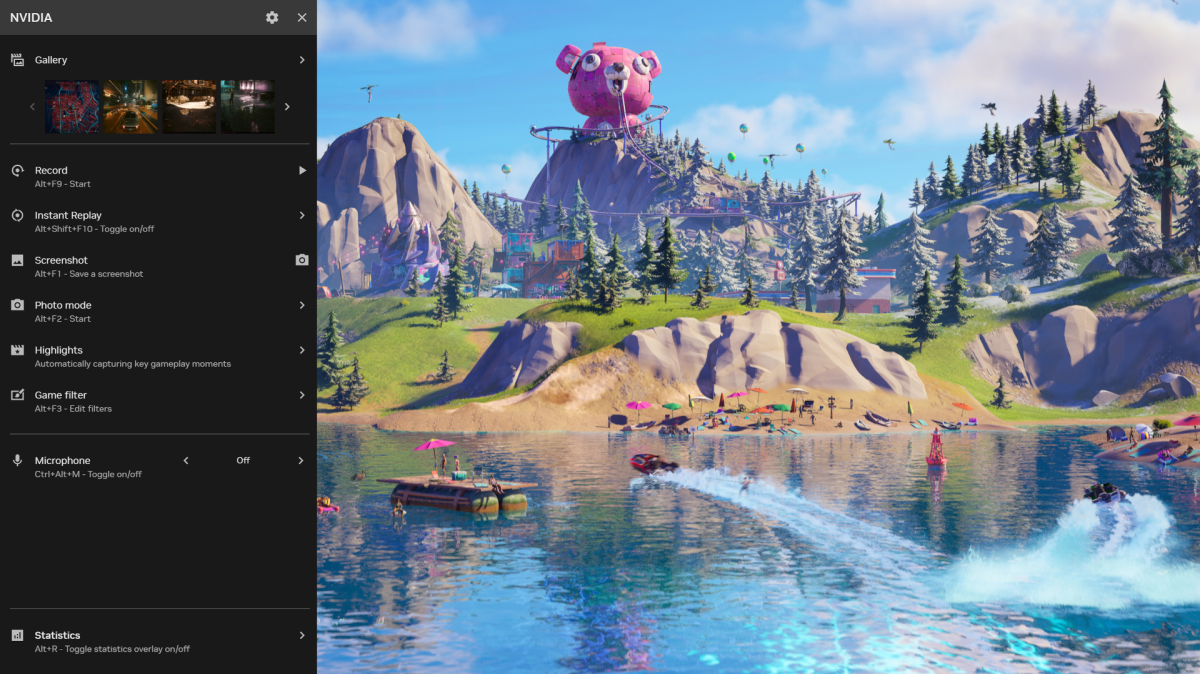
With the Nvidia App, you don’t need a separate third-party program to record your gameplay or take screenshots. To do so, bring up the integrated in-game overlay using the Alt + Z hotkey.
Called Nvidia ShadowPlay, it lets you capture 8K screenshots, record GIFs, and even create an instant replay reel based on the last 30 seconds of gameplay. Video recording can go as high as 8K at 30 FPS with HDR (with more standard resolutions able to go even higher).

Nvidia

Nvidia
Nvidia
These are very useful features, not just for recording and sharing gameplay with viewers and/or friends, but also for analyzing graphics and performance when you review the footage later.
There’s also a Broadcast feature in the Nvidia App that allows you to livestream gameplay to popular platforms including Twitch, YouTube, and Facebook Live. Camera and custom graphic overlays are possible with Broadcast, and it’s quick to get up and running once you’re acquainted.
Of course, you can always choose to use those other third-party streaming apps that have a lot of the same (or more) functionality, but it’s nice to know this is a viable option in the Nvidia App.
Tip #5: Manage your drivers
Nvidia’s previous GeForce Experience was meant to be an easier way to update and manage your drivers. The Nvidia App, as its replacement, aims to do a lot of the same except better.
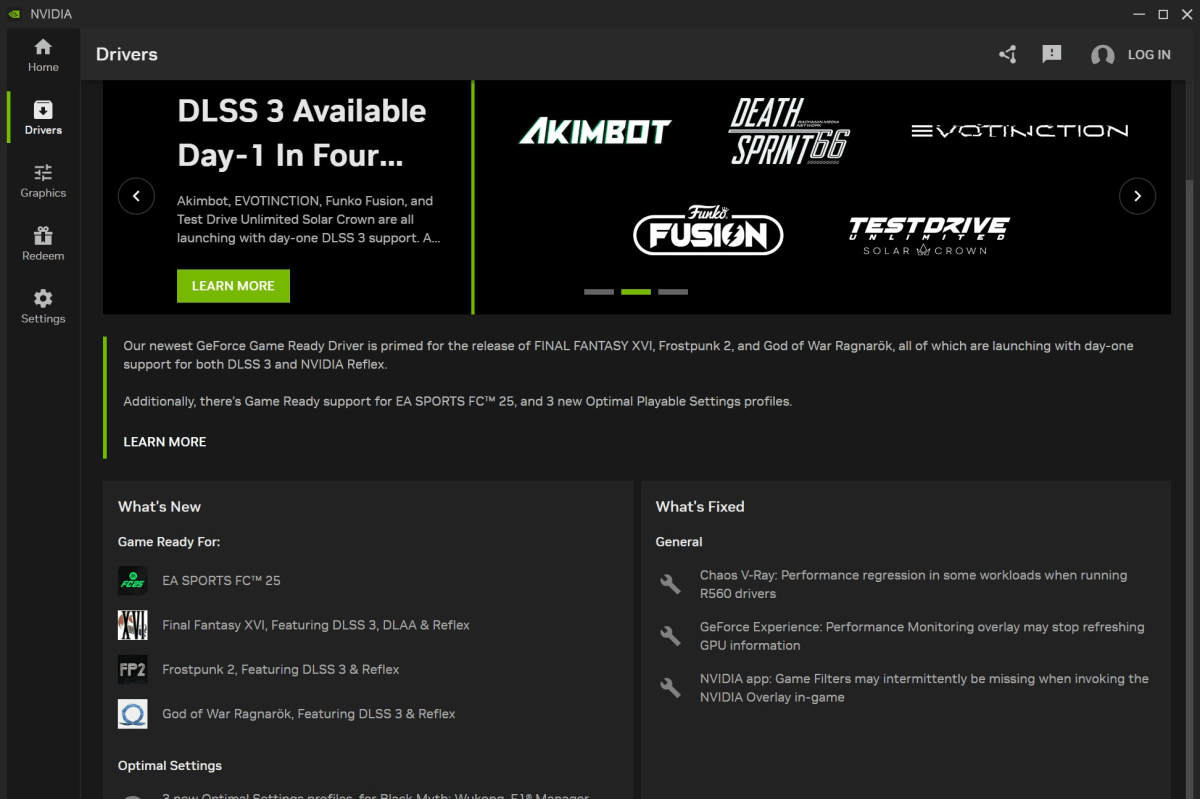
You can choose between Game Ready or Studio drivers, and the Nvidia App will automatically populate when driver updates are available. (GPU driver updates often contain myriad bug fixes, new features, and general improvements, so it’s smart to keep on top of them.)

Thiago Trevisan / IDG

Thiago Trevisan / IDG
Thiago Trevisan / IDG
One key improvement in the Nvidia App is more driver information readily available in the app itself. For example, you can see details regarding things like what was changed and which games were affected. General fixes, even ones addressing the Nvidia App itself, are also listed under the “What’s Fixed” area of the Drivers section.
Driver management in the Nvidia App even lets you know when a new optimization profile is available for a particular game, which is great if you’re waiting to optimize something in your library. The most saliant information, though, might just be the “Game Ready For” area that shows the newest titles that just got their Game Ready drivers.
All in all, there’s a lot worth exploring in the Nvidia App even though it’s still technically in beta. If you haven’t jumped on it yet, consider giving it a go — it’s already packed with features that’ll improve your gaming.
Further reading: Settings every PC gamer should tweak ASAP
Author: Thiago Trevisan, Contributor
Thiago Trevisan is a Mac and PC enthusiast for over 20 years, and has written for PCWorld and Macworld since 2021. He runs the YouTube channel Classical Technology with over 50,000 subscribers, which covers NVIDIA and AMD graphics cards, along with Macs such as the 2019 Mac Pro, and also writes about technology for HotHardware. Thiago has a degree in Classical Piano performance from the Hartt School of Music at the University of Hartford.
Recent stories by Thiago Trevisan:
How to connect a PS5 controller to your laptop (and set it up right)Are Chromebooks good for gaming? No… but actually also yesGeForce RTX 4070 vs. RTX 3080 vs. Radeon RX 6800 XT: Which to buy?


